
Classic
®
Instructions for Use
IPS

2
Table of Contents
3 IPS Classic
6 Zusammensetzung
7 IPS Classic – Shade Code
10 IPS Classic – Description of the assortments
10 IPS Classic Mini Kits
11 IPS Classic Opaquer / IPS Classic V Opaquer
12 IPS Lowpaque / IPS Lowpaque V
13 IPS Margin / IPS Margin V
14 IPS Opaque Dentin / IPS Opaque Dentin V
15 IPS Classic Dentin / IPS Classic V Dentin / IPS Classic Intensive Dentin
16 IPS Classic / IPS Classic V Incisal and Transparent materials
17 IPS Effect
18 IPS Impulse
19 IPS Gingiva
20 IPS Shade / IPS Shade V
20 IPS Stains P
21 IPS Classic Glaze Paste
21 IPS Classic Correction Powder
22 IPS Classic – Liquids
24 IPS Classic – Shade Selection
25 IPS Classic – Layering diagrams
26 IPS Classic – Framework design
27 Functional support of the veneering ceramic
28 Framework design for ceramic shoulders
28 Framework strength
29 Framework design for bridges
30 Design of bridge pontics
30 Interface between metal and ceramic
31 IPS Classic – Instructions for Use
31 Starting situation
31 Fabricating the framework
31 Oxide firing
32 1
st
opaquer firing
33 2
nd
opaquer firing
34 1
st
margin shoulder firing
35 2
nd
margin shoulder firing
35 1
st
dentin and incisal firing
37 2
nd
dentin and incisal firing
38 Preparing the restoration for glaze firing
38 Stain and characterization firing
39 Glaze firing
40 Corrective firings
42 IPS Classic – Firing parameters
44 IPS Classic – Materials combination tables
44 Chromascop
45 A–D
46 IPS Classic – A sound concept always reaps success!
3
Classic
®
IPS
IPS – Ivoclar Porcelain System
A high requirement is placed on ceramic
restorations today. Therefore, every ceramist
needs a program capable of reproducing top
aesthetic results, while offering maximum
possibilities for individual skills.
The Chromascop shade guide applies for the
IPS Classic ceramic material. IPS Classic V is
based on the A–D shade guide.
The Material
New methods of production and accent on
innovation provided the impetus for
developing this IPS Classic ceramic line.
Stringent quality control of materials and a
special distribution system for particle size
give IPS Classic its several advantages. For
example, feldspar, the raw material, is sub-
jected to chemical analysis prior to selection
and checked for impurities.
Precise compounding of the components
emphasizes properties such as the coefficient
of thermal expansion, transformation range
and crystal growth. That makes it possible to
mix most the materials of IPS Classic and
IPS Classic V and process them together.
Advantages of the IPS Classic
Ceramic Line
– Clinically proven
–Efficient and economical use of the
material
– Highly aesthetic restorations
– Easy handling
– Excellent matching of shade with the
Chromascop and A–D shade guide
– Special materials for individual
characterization effects
– Opalescent incisal and effect materials
– Coordinated equipment components:
Programat
®
X1, Programat P200
– Compatible alloys
– Suitable cement Vivaglass
®
CEM
CTE – Coefficient of Thermal
Expansion
There are over two thousand alloys available
on the dental market worldwide. Because of
this large number, it is not possible to test all
these alloys with regard to their compatibility
with IPS Classic and IPS Classic V. As a result,
we are limiting our recommendations to the
respective cooling phases of the different
alloy types.
Generally, the specifications of the alloy
manufacturer must be observed. An
important factor is the coefficient of thermal
expansion (CTE) following the casting
procedure in the dental laboratory. The CTE
should be measured in the same temperature
range as that of ceramic materials. For the
CTE of IPS Classic and IPS Classic V the
temperature range is given at 25–500°C as
stipulated by EN/ISO 9693.
Generally, IPS Classic and IPS Classic V are
suitable for use with alloys with a CTE of
approx 13.7 to 15.5 x 10
-6
x K
-1
at
25–500°C. Depending on the type the
composition of the alloy, the firing
temperature and the cooling phase in
particular have to be taken into
consideration.
Alloys with a CTE in the lower range (e.g.
approx 13.7–14.5 at 25–500°C) can be
processed with standard cooling. That is, the
fired object is removed from the ceramic
furnace after the firing program with a
cooling phase in the open furnace has come
to an end. Ceramic furnaces from Ivoclar
Vivadent announce the end of the firing
program with an acoustic signal.
4
Long-term cooling depends on the type and
the CTE of the alloy used. A longer cooling
phase increases the CTE of IPS Classic and
IPS Classic V. Repeated firings have a similar
effect.
Rule of thumb: The higher the CTE of the
alloy, the longer the long-term cooling. If
long-term cooling is required, it should be
carried out after every firing procedure,
except when firing the opaquer or soldering.
Alloys
The compatibility of the following alloys and
IPS Classic and IPS Classic V have been
thoroughly tested. Additionally, they are
listed on the Ivoclar Vivadent Alloys Chart
(Dental Alloys – Compositions and physical
properties).
The product range may vary from country to country.
13.7 14.5 15.5
(25–500°C/ (25–500°C/ (25–500C/
77–932°F) 77–932°F) 77–932°F)
Normal cooling Long-term cooling
Ceramic furnaces of other
manufacturers often feature
opening mechanisms different
from that of Ivoclar Vivadent
furnaces. Therefore, the firing
conditions may also differ. Make
sure to observe these varying
firing conditions.
IPS d.SIGN
®
series
IPS d.SIGN
®
98
IPS d.SIGN
®
96
IPS d.SIGN
®
91
IPS d.SIGN
®
84
IPS d.SIGN
®
67
IPS d.SIGN
®
59
IPS d.SIGN
®
53
Implant series
IS
®
-85*
IS
®
-64*
High Gold content
Aquarius Hard
Aquarius
Aquarius HPF
Aquarius XH
Y-2
Y-Lite
Sagittarius
Reduced Gold content
W
Lodestar
®
W-3*
Evolution
®
Pd based
Capricorn 15
Spartan
®
Plus*
Cr or Ni base
Pisces Plus
4all
®
IPS d.SIGN
®
series
IPS d.SIGN
®
30
IPS d.SIGN
®
15
IPS Classic
* Large full coverage pontics and slow cooling should be avoided.
✓
✓
✓
✓
✓
✓
✓
✓
✓
✓
✓
✓
✓
✓
✓
✓
✓
✓
✓
✓
✓
✓
✓
✓
✓
✓

5
Indication
– Metal-ceramic veneers
Contraindication
– If patients are known to be allergic to any
of the ingredients of IPS Classic or IPS
Classic V, the material should not be used.
Important processing
restrictions
– Combination with other metal-ceramic
materials (e.g. IPS d. SIGN).
– Combination with metal-free veneering
ceramics (e.g. IPS Empress).
– Use of IPS Shade, IPS Shade V and
IPS Stains-P during the layering procedure
(e.g. between the dentin and incisal layer)
– Firing of IPS Classic onto incompatible
alloys
– Mixing of paste materials with materials in
powder form
Important information
– Ceramic furnaces of other manufacturers
often feature opening mechanisms
different from that of Ivoclar Vivadent
furnaces. Therefore, the firing conditions
may also differ. Make sure that these
varying firing conditions are taken into
account when working with IPS Classic.
Warning
– Finishing ceramic restorations results in
grinding dust. Avoid inhalation. Use
suction equipment or protective masks.

6
Composition
The IPS Classic and IPS Classic V ceramic materials and
liquids contain the following main components:
– Ceramic materials
SiO
2
: 40–65 wt. %
Additional contents are: Al
2
O
3
, B
2
O
3
, BaO, CaO, CeO
2
,
K
2
O, MgO, Na
2
O, P
2
O
5
, SnO
2
, TiO
2
, ZrO
2
and pigments
– Opaquer pastes, Shades, Stains and glazing materials
contain ceramic material and 25–40 % glycols
– IPS Classic Build-Up Liquids, N,S and L
Components: Water, butandiol and chloride
– IPS Classic Model Separator I
Components: Ethyl acetate, nitro-cellulose, softener
– IPS Classic Isolating Liquid
Component: Paraffin oil
– IPS Classic Glaze and Stain Liquid
Component: Ethylene glycol
– IPS Margin Build-Up Liquid
Components: Water and cellulose derivative
– IPS Margin Isolating Liquid
Components: Wax dissolved in hexane
– IPS Ceramic Separator
Components: Butylene acetate and pigments in nitro-
cellulose
Note:
Protect liquids from sunlight and heat!
Storage
–Protect material in powder form from moisture
– Store material in paste form at room temperature
(18-25°C/64-77°F)
7
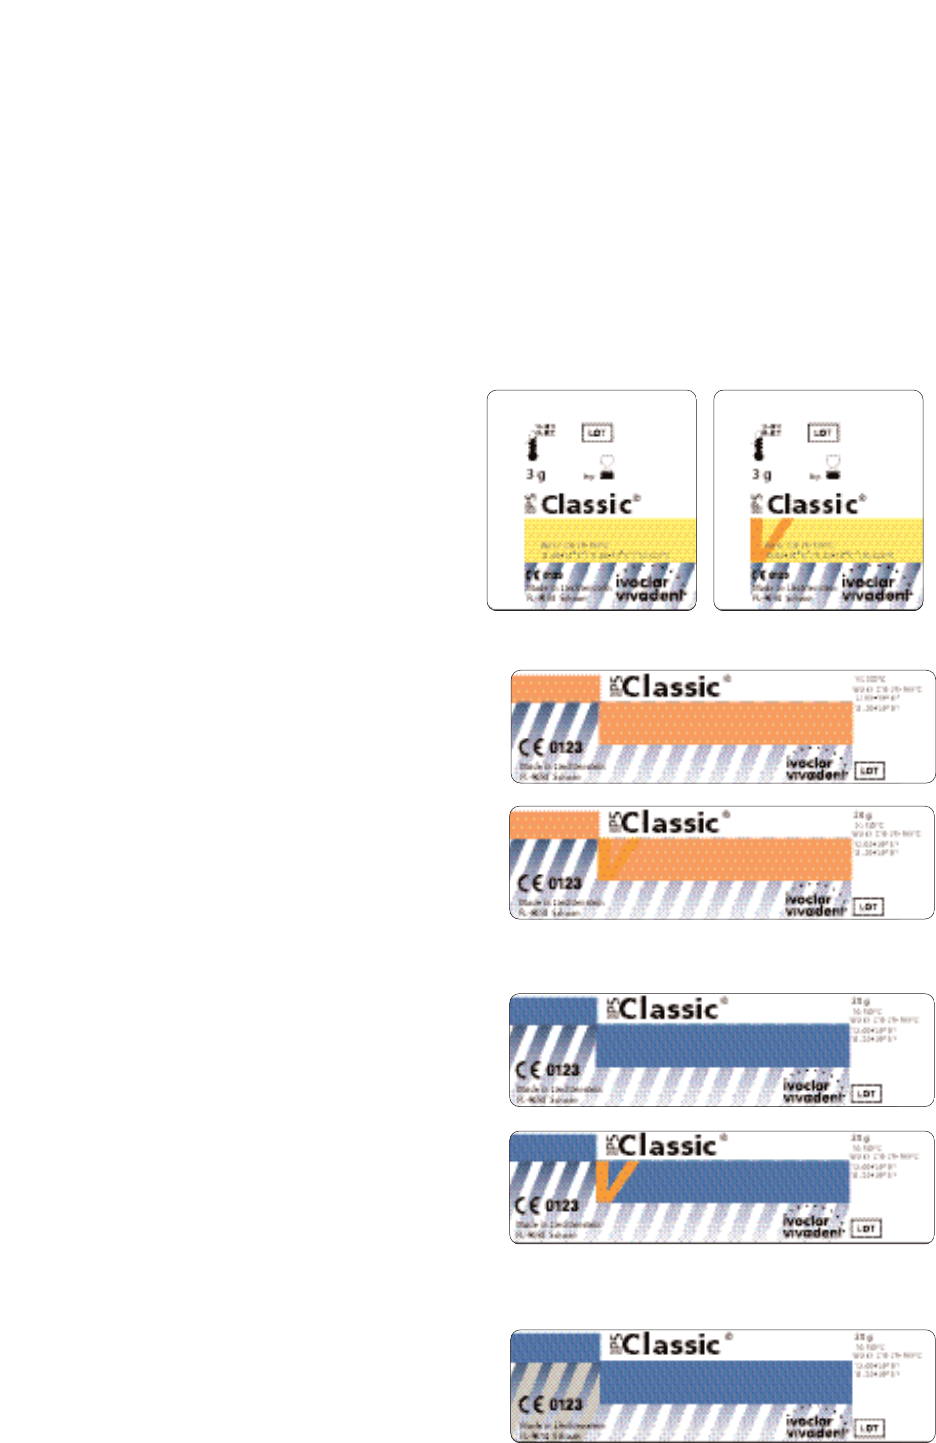
Classic and Classic V – Shade code
IPS
IPS
For a better distinction of the individual
materials labels have been selected for the
different shades. This system enables a
convenient classification of the different jars
at work.
Colouring of labels of the materials
IPS Classic Opaquer
IPS Classic V Opaquer
IPS Classic Intensive Opaquer
IPS Classic Intensive Opaquer V
IPS Classic Dentin
IPS Classic V Dentin
IPS Classic Intensive Dentin
IPS Classic Incisal
IPS Classic V Incisal
IPS Classic Transparent
IPS Classic Opal Incisal
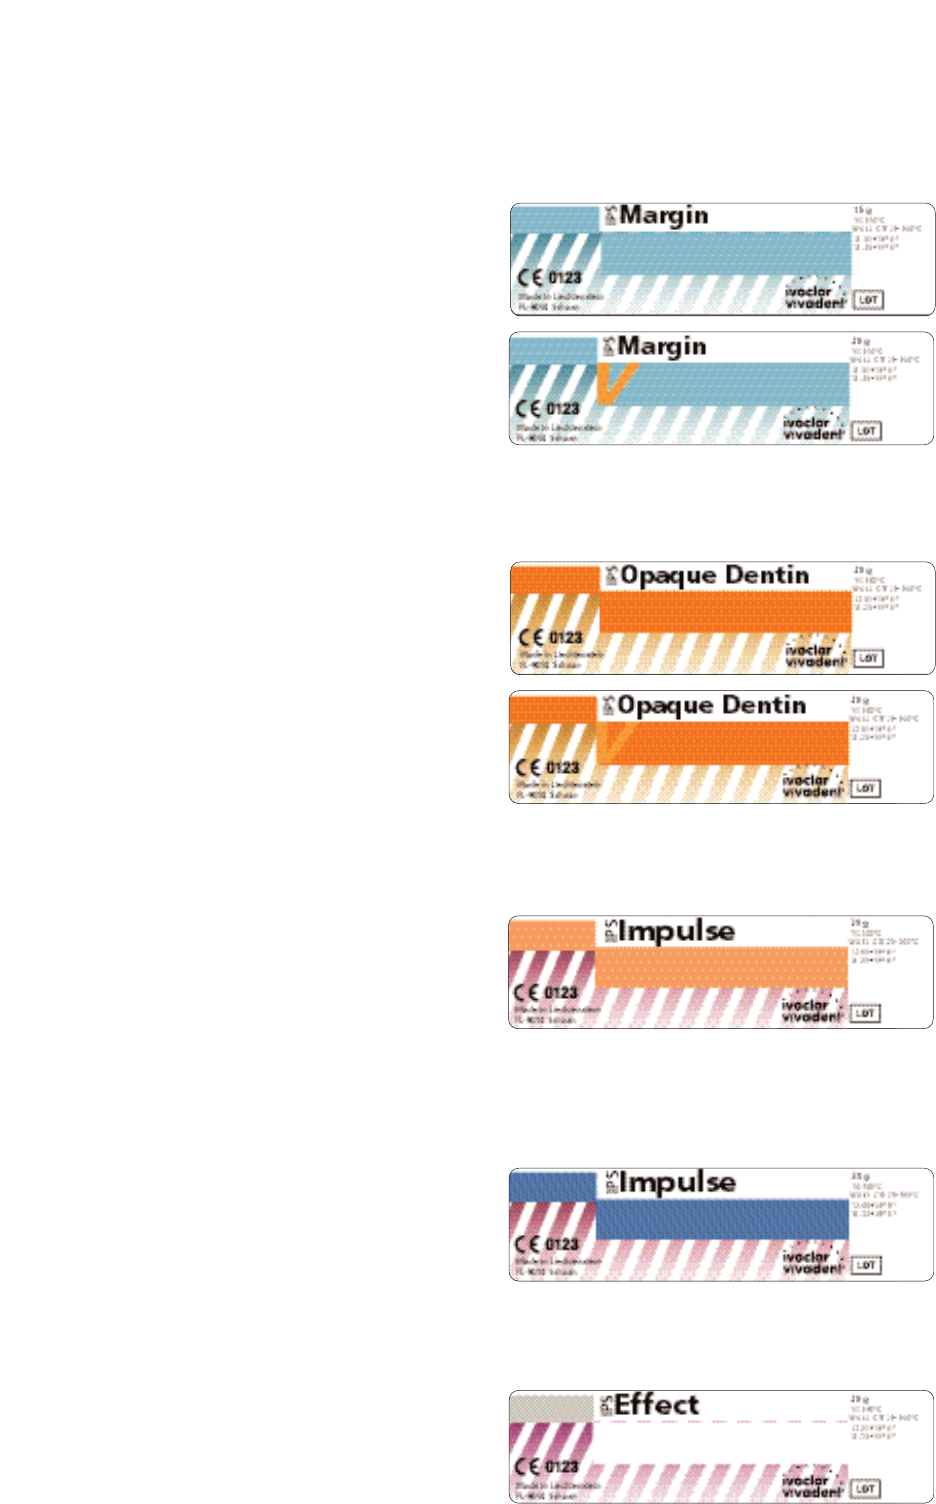
8
IPS Margin
IPS Margin V
IPS Opaque Dentin
IPS Opaque Dentin V
IPS Impulse
IPS Impulse Incisal
IPS Effect

9
IPS Lowpaque
IPS Lowpaque V
IPS Stains-P
IPS Classic Glazing
10
Classic and Classic V –
Description of the assortments
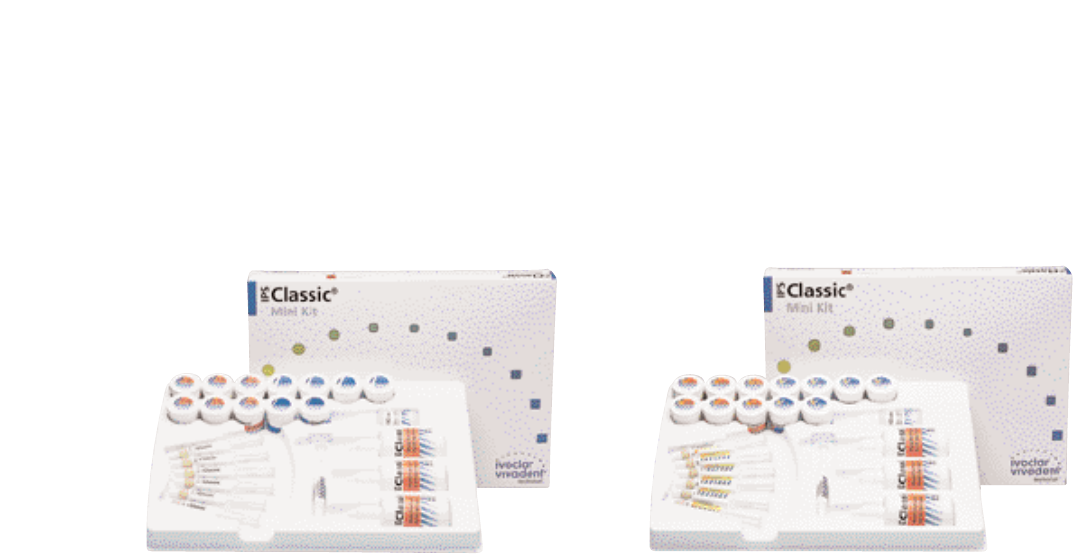
IPS Classic Mini Kits
IPS Classic Mini Kit
IPS Classic V Mini Kit
IPS
IPS
Delivery form
IPS Classic Mini Kit (Chromascop)
–6 IPS Classic Opaquer, 3 g each
(130, 140, 210, 230, 310, 410)
–6 IPS Classic Dentin materials, 20 g each
(130, 140, 210, 310, 410, 230)
–4 IPS Classic Opal Incisal materials, 20 g each (1, 2, 4, 5)
–2 IPS Classic Transparent material, 20 g each (T-2, T-4)
–1 IPS Classic Glaze Paste, 3 g
–1 IPS Classic Glaze and Stain Liquid, 15 ml
–3 IPS Classic Build-Up Liquids, 60 ml each (L, N, S)
IPS Classic V Mini Kit
–6 IPS Classic V Opaquer, 3 g each
(A2, A3, A3.5, B3, C2, D3)
–6 IPS Classic V Dentin materials, 20 g each
(A2, A3, A3.5, B3, C2, D3)
–4 IPS Classic V Incisal materials, 20 g each (1, 2, 3, 4)
–2 IPS Classic V materials, 20 g each (Clear, Neutral)
–1 IPS Classic Glaze Paste, 3 g
–1 IPS Classic Glaze and Stain Liquid, 15 ml
–3 IPS Classic Build-Up Liquids, 60 ml each (L, N, S)
11
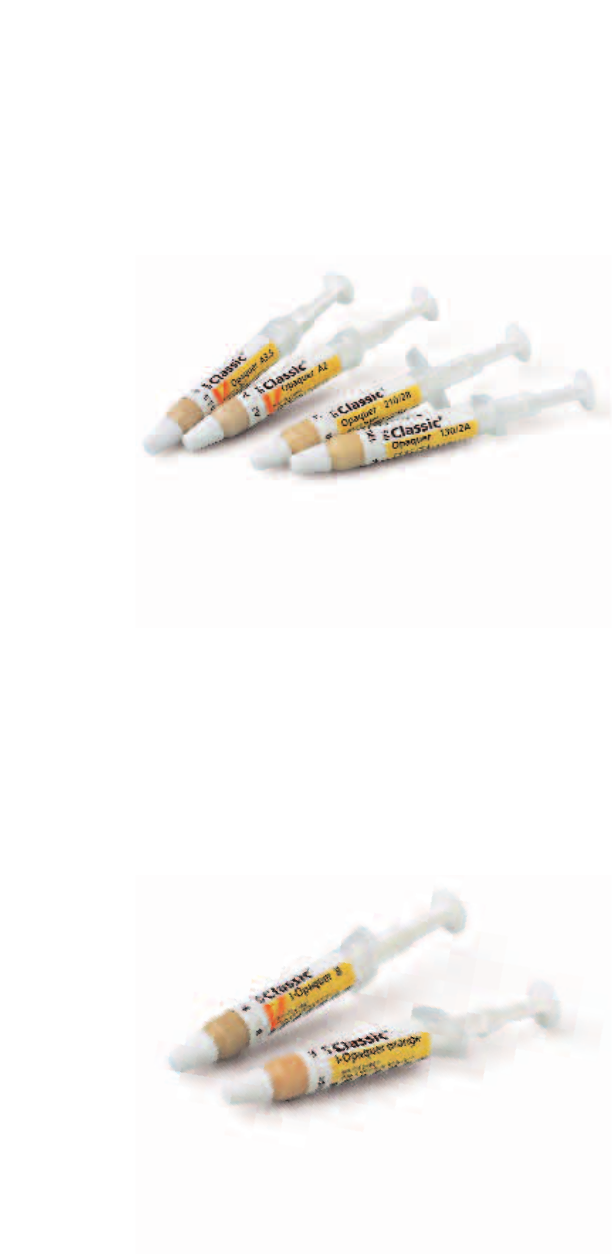
IPS Classic Opaquer / IPS Classic V Opaquer
Opaquer pastes have an ideal consistency and excellent
stability that ensures an outstanding masking capability even
when applied in thin layers. The opaquer pastes are
distinguished by their easy and economic processing.
Delivery form
IPS Classic Opaquer
–3 IPS Classic Opaquer, 3 g each;
Shades: 110, 120, 130, 140, 210, 220, 230, 240, 310,
320, 330, 340, 410, 420, 430, 440, 510, 520, 530, 540
IPS Classic V Opaquer
– 3 x IPS Classic V Opaquer, 3 g each;
Shades: A1, A2, A3, A3.5, A4, B1, B2, B3, B4, C1, C2, C3,
C4, D2, D3, D4
IPS Classic Intensive Opaquer / IPS Classic V Intensive Opaquer
Specially shaded intensive opaquer material pastes for
individual characterizations in the opaquer area.
Delivery form
IPS Classic Intensive Opaquer
–3 IPS Classic Opaquer, 3 g each;
Shades: white, orange, brown, violet, grey
IPS Classic V Intensive Opaquer
– 3 x IPS Classic V Opaquer, 3 g each;
Shades: A, B, C, white, violet
12
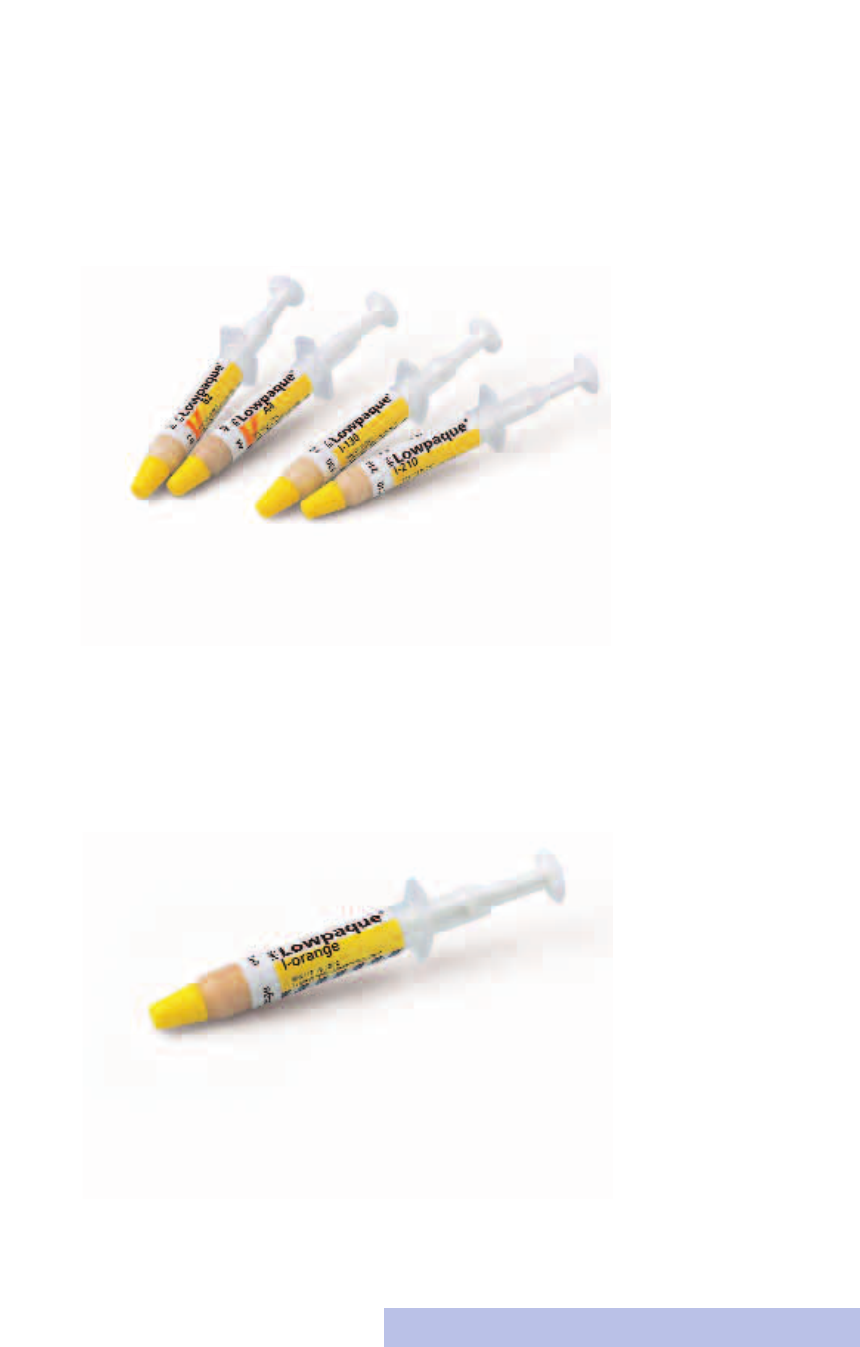
IPS Lowpaque / IPS Lowpaque V
IPS Lowpaque has been especially developed for use with
bio-alloys, most of which demonstrate a low melting point.
Given their thermal stability these bio-alloys require a low-
firing opaquer. It goes without saying, however, that
IPS Lowpaque is suitable for other ceramic alloys, in addition
to bio-alloys.
Delivery form
IPS Lowpaque
–3 IPS Lowpaque, 3 g each;
Shades: 110, 120, 130, 140, 210, 220, 230, 240, 310,
320, 330, 340, 410, 420, 430, 440, 510, 520, 530, 540
IPS Lowpaque V
– 3 x IPS Lowpaque V, 3 g each;
Shades: A1, A2, A3, A3.5, A4, B1, B2, B3, B4, C1, C2, C3,
C4, D2, D3, D4
IPS Lowpaque Intensive / IPS Lowpaque V Intensive
Specially shaded intensive opaquer pastes for individual
characterizations in the opaquer area.
Delivery form
IPS Lowpaque Intensive
–3 IPS Lowpaque, 3 g each;
Shades: IO-1 white, IO-2 orange, IO-3 brown, IO-4 violet,
IO-5 grey
IPS Lowpaque V Intensive
– 3 x IPS Lowpaque V Intensive, 3 g each;
Shades: IO A, IO B, IO C, IO white, IO violet
The product range may vary from country to country.
13
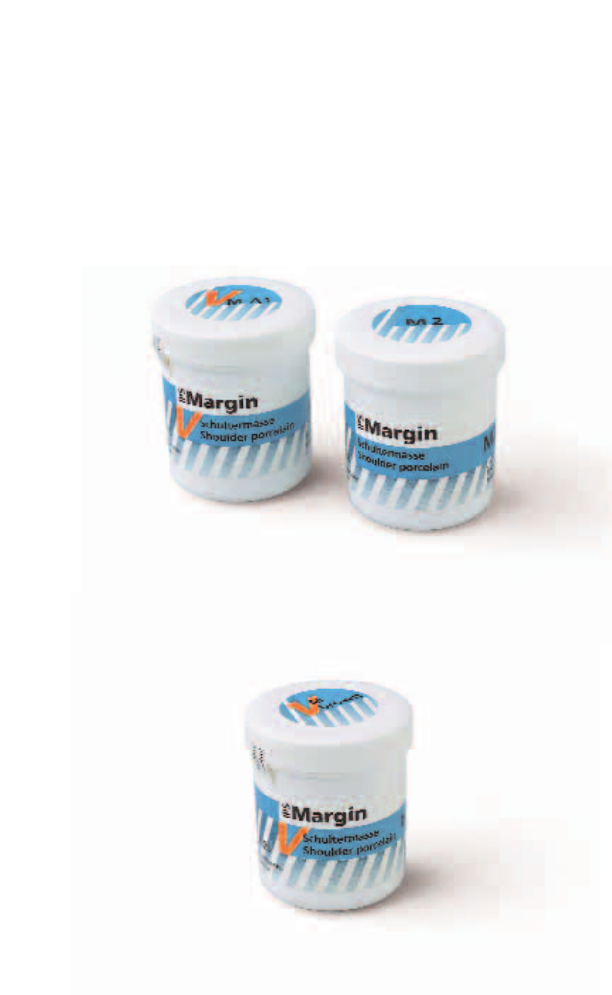
IPS Margin / IPS Margin V
The IPS Margin shoulder materials are distinguished for their
stability of shape and low shrinkage. They permit the fabrica-
tion of aesthetic crown margins that demonstrate optimum
accuracy of fit. In addition, intensive margin materials are
available for the application of special effects in the cervical
area. Since the ceramic shoulder is often located supra-
gingivally, particularly in patients suffering from periodontal
diseases, utmost shade match is required in this area.
Therefore, these materials are intended for individual
characterizations and can be mixed with ceramic shoulder
materials to imitate the typically bony effect of the root.
In addition, the shoulder materials can be mixed with each
other and also with the intensive materials (M10–M14) to
achieve a wide range of shades in the cervical area.
Delivery form
IPS Margin
– IPS Margin, 15 g each;
Shades: M1 (110), M2 (120, 130), M3 (140, 210, 220),
M4 (230, 240), M5 (330, 340) M6 (310, 320),
M7 (520, 530), M8 (540), M9 (410, 420, 430, 440, 510)
IPS Margin Intensive
– IPS Margin Intensive, 15 g each;
M10 (neutral), M11 (yellow), M12 (orange), M13 (brown),
M14 (pink)
IPS Margin V
– IPS Margin V, 20 g each;
Shades: A1, A2, A3, A3.5, A4, B1, B2, B3, B4, C1, C2, C3,
C4, D2, D3, D4
brown, yellow, orange
14
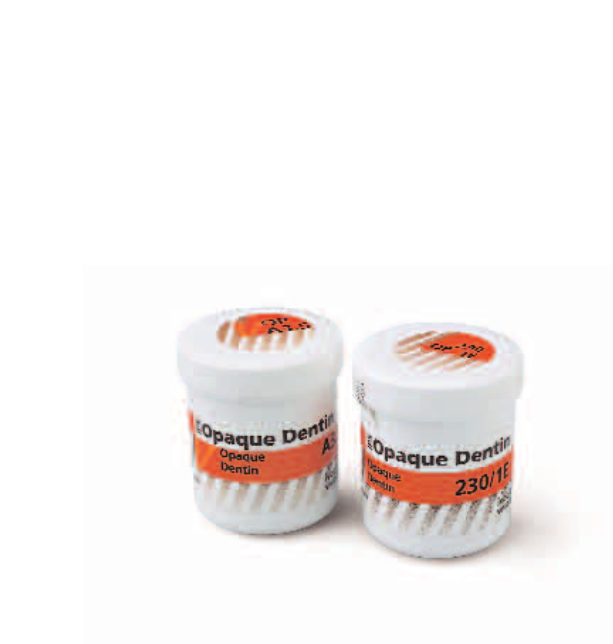
IPS Opaque Dentin / IPS Opaque Dentin V
Considering the variety of different layer thicknesses when
processing a crown or bridge and the limited space available,
a dentin material with a higher level of opacity and a more
intensive shade effect can be very helpful. These materials
can be used on their own when space is limited, and they
can be mixed with the regular dentin material. They can be
used as a substitute for dentin materials when space is
limited, as secondary dentin material in the incisal area and
the cervical, interdental and lingual area, for bridge pontics
and for mixing with the IPS Classic dentin materials.
Delivery form
IPS Opaque Dentin
– IPS Opaque Dentin materials, 20 g each;
Shades: 120, 130, 140, 210, 220, 230, 240, 310, 320,
410, 420, 430, 440, 510
IPS Opaque Dentin V
– IPS Opaque Dentin V materials, 20 g each;
Shades: A1, A2, A3, A3.5, A4, B1, B2, B3, B4, C1, C2, C3,
C4, D2, D3, D4,
brown, yellow, orange
15
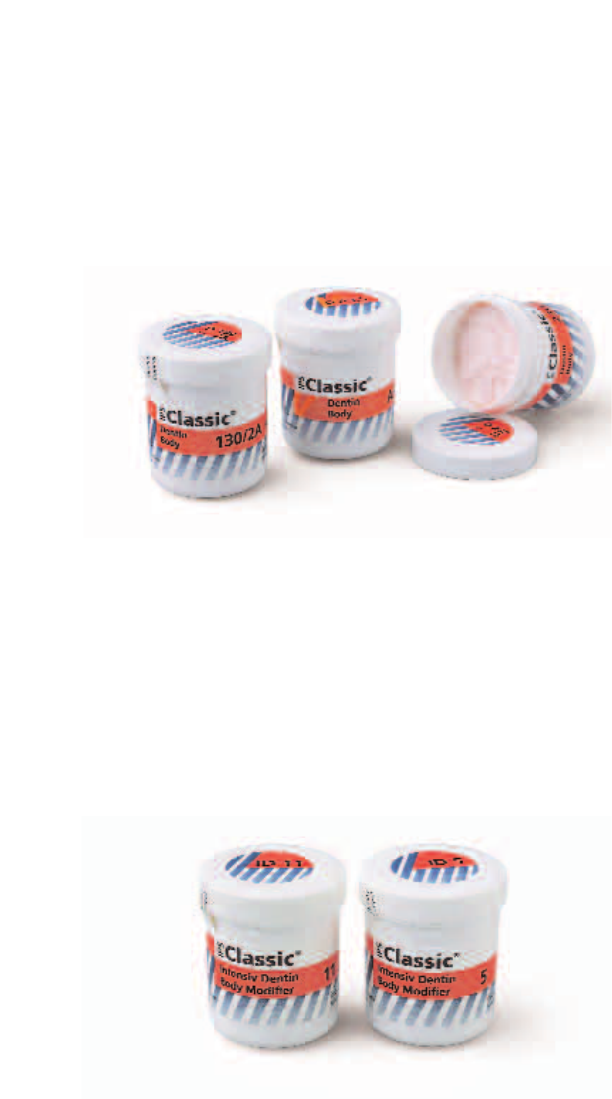
IPS Classic Dentin / IPS Classic V Dentin
These dentin materials owe their vitality and shade brilliance
to the coordinated distribution of grain sizes.
Delivery form
IPS Classic Dentin
– IPS Classic Dentin materials, 20 g or 100 g;
Shades: 110, 120, 130, 140, 210, 220, 230, 240, 310,
320, 330, 340, 410, 420, 430, 440, 510, 520, 530, 540
IPS Classic V Dentin
– IPS Classic Dentin V materials, 20 g or 100 g;
Shades: A1, A2, A3, A3.5, A4, B1, B2, B3, B4, C1, C2, C3,
C4, D2, D3, D4
IPS Classic Intensive Dentin
This material is used for individualized shading of ceramic
restorations and can be mixed with any IPS Classic material.
Delivery form
IPS Classic Intensive Dentin
– IPS Classic Dentin materials, 10 g;
Shades: ID 1 (neutral), ID 2 (white), ID 3 (yellow),
ID 4 (honey), ID 5 (light brown), ID 6 (dark brown),
ID 7 (pink), ID 8 (grey), ID 9 (blue), ID 10 (clear pink),
ID 11 (red pink)
16
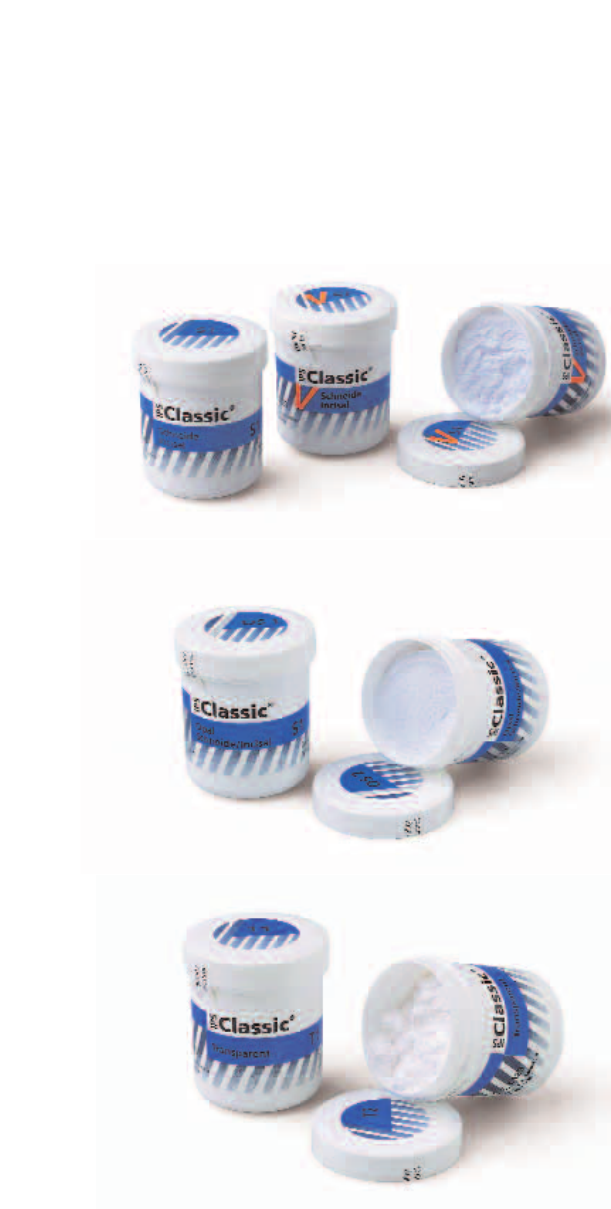
IPS Classic and IPS Classic V Incisal and Transparent Materials
The shade gradation of the incisal materials complement the
Chromascop and the A–D shade guides as well as the natural
incisal material. They owe their vitality and shade brilliance to
the coordinated distribution of grain sizes and the opal
effect.
The Transparent materials (T1–T4) demonstrate a shade
gradation similar to that of natural incisal areas. Additionally,
the material is available in clear and neutral.
Delivery form
IPS Classic Incisal
– IPS Classic Incisal, 20 g or 100 g;
Shades: S1, S2, S3, S4, S5
IPS Classic V Incisal
– IPS Classic Incisal, 20 g, 100 g or 250 g;
Shades: S1, S2, S3, S4
IPS Classic Opal Incisal
– IPS Classic Opal Incisal, 20 g or 100 g;
Shades: OS1, OS2, OS3, OS4, OS5
IPS Classic Transparent
– IPS Classic Transparent material 20 g or 100 g;
Shades: T1 (neutral), T2 (reddish), T3 (greyish),
T4 (transparent)
IPS Classic V Transparent
– IPS Classic Transparent material, 20 g or 100 g;
Shades: T neutral, T (clear)
17
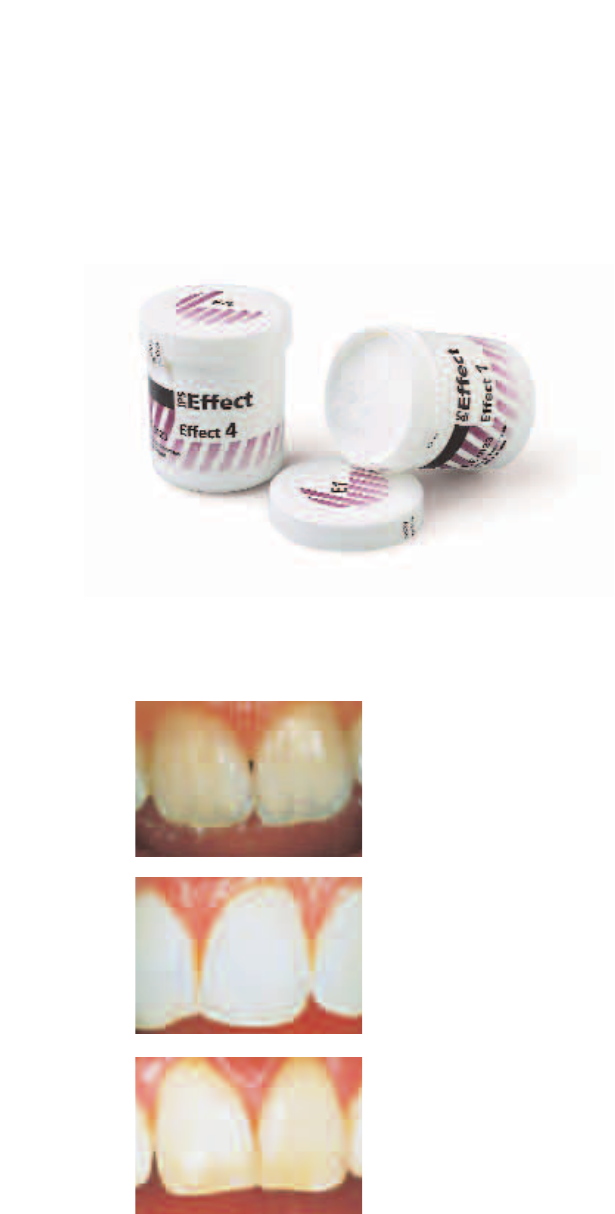
IPS Effect
These ready-mixed individual ceramic materials enable the
quick and easy reproduction of opalescent effects in the
incisal area. Users may chose between five shade gradations
of the Effect material. Starting with Effect 1, which
demonstrates true-to-nature opalescence in conjunction with
high translucency, the brightness value gradually increases
from Effect 2 to Effect 5.
Delivery form
IPS Effect
– IPS Effect, 20 g;
Shades:
E1 super opal
E2 opal
E3 whitish opal
E4 white-opal
E5 red-brown-opal
Different possibilities of application with
IPS Effect materials
IPS Effect 1
IPS Effect 2
IPS Effect 3
18
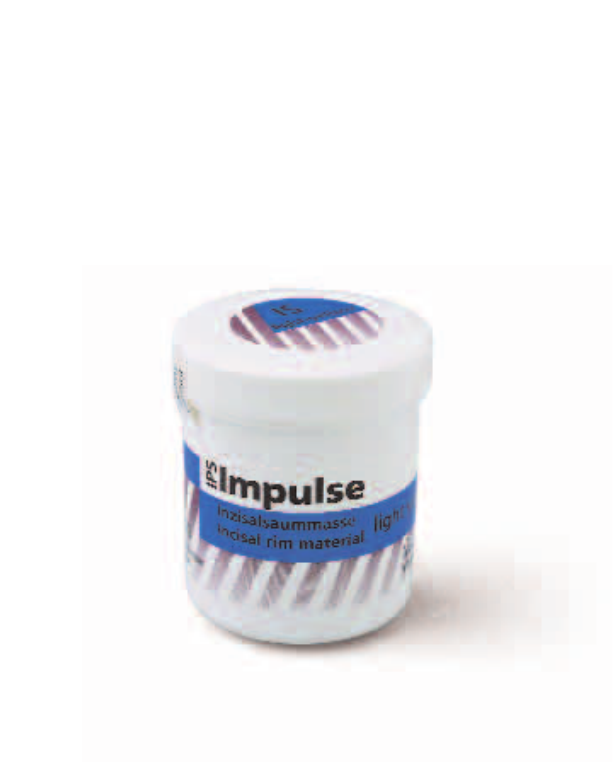
IPS Impulse
The ready-mixed individual ceramic materials facilitate the
application of true-to-nature effects.
Mamelon materials
They are available in five different shade gradations and
demonstrate high opacity and optimum masking capabilities
even when applied in very thin layers. Depending on the
working habits of the user, the material is applied in thin
stripes on reduced dentin. In this way, an individualized
appearance of the incisal third can be achieved.
Incisal Edge materials
This material is used to achieve what is known as the 'halo
effect', which is caused in natural teeth by light refraction at
the incisal edge.
Incisal materials
They are available in two shade nuances and are suitable to
modify or intensify any incisal material or can be applied
directly.
Transparent materials
The Transparent materials are available in three shade
nuances. They are suitable to imitate shaded, transparent
areas, particularly in the incisal third.
Occlusal Dentin materials
They are available in two different shades and are used to
provide the basic shade for occlusal surfaces and to intensify
the chroma.
Molar Incisal material
It is used to reproduce the whitish incisal areas especially in
posterior teeth. However, it can also be mixed with any
incisal material to imitate the whitish incisal areas in anterior
teeth.
Delivery form
IPS Impulse
– IPS Impulse Mamelon materials, 20 g;
Shades: MM1, MM2, MM3, MM4, MM orange
– IPS Impulse Incisal Edge materials, 20 g;
Shades: yellow, light-yellow
– IPS Impulse Incisal materials, 20 g;
Shades: yellow-grey, grey
– IPS Impulse Transparent materials, 20 g;
Shades: blue, yellow-grey, grey
– IPS Impulse Occlusal Dentin materials, 20 g;
Shades: brown, yellow, orange
– IPS Impulse Molar Incisal material, 20 g;
Shade: MS
19
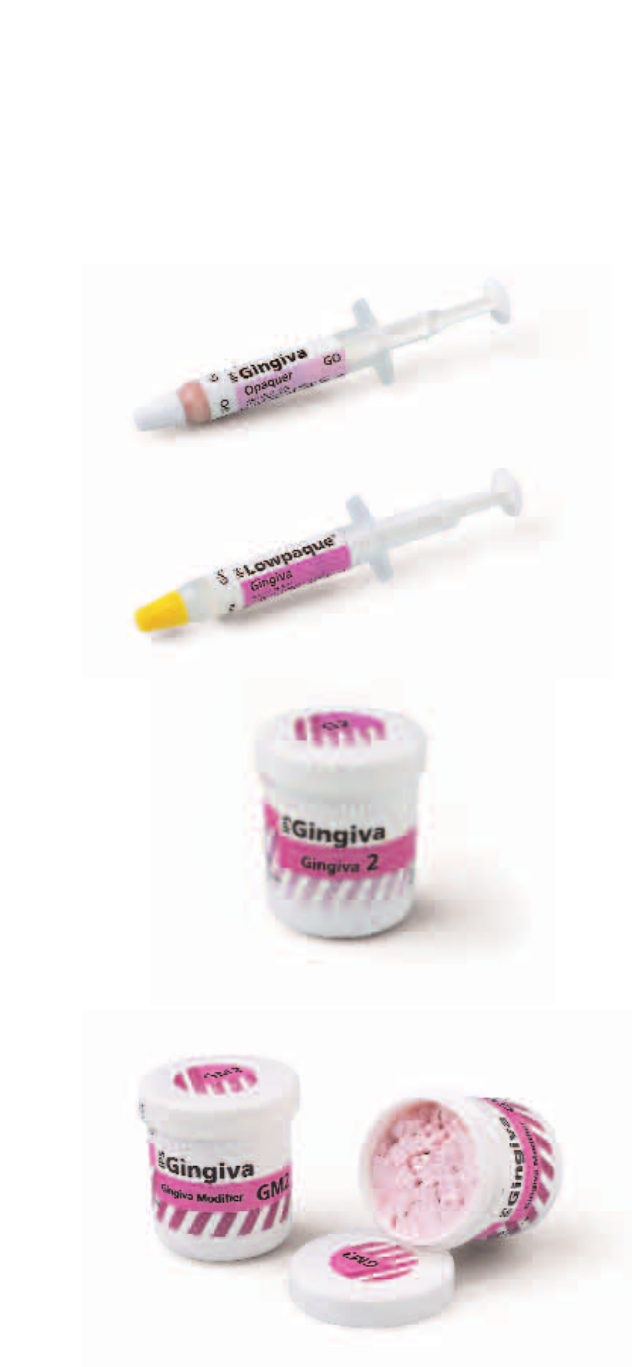
IPS Gingiva
The IPS Gingiva materials are suitable for aesthetic solutions
that require true-to-nature reproduction of the gingival area
for metal-ceramic restorations or implant superstructures in
accordance with natural gingival shades and characteristics.
The ready-mixed ceramic materials are used to
–reproduce natural gingiva
– mask long cervicals in bridge restorations
– fill large interdental spaces and
– to mask those areas of implant superstructures facing the
gingiva
The pink opaquer paste is used to mask the marginal areas in
metal frameworks or implant superstructures. The four
Gingiva modifiers can be used alone or mixed with the five
Gingiva materials depending on the patient’s situation.The
shade gradations range from orange to reddish to bluish.
Delivery form
IPS Gingiva Opaquer
– IPS Gingiva Opaquer, 3 g;
Shade: pink
IPS Lowpaque Gingiva
– IPS Lowpaque Gingiva, 3 g;
Shade: pink
IPS Gingiva
– IPS Gingiva, 20 g;
Shades: G1, G2, G3, G4, G5
IPS Gingiva Modifier
– IPS Gingiva Modifier, 20 g;
Shades: GM 1, GM2, GM3, GM4
20
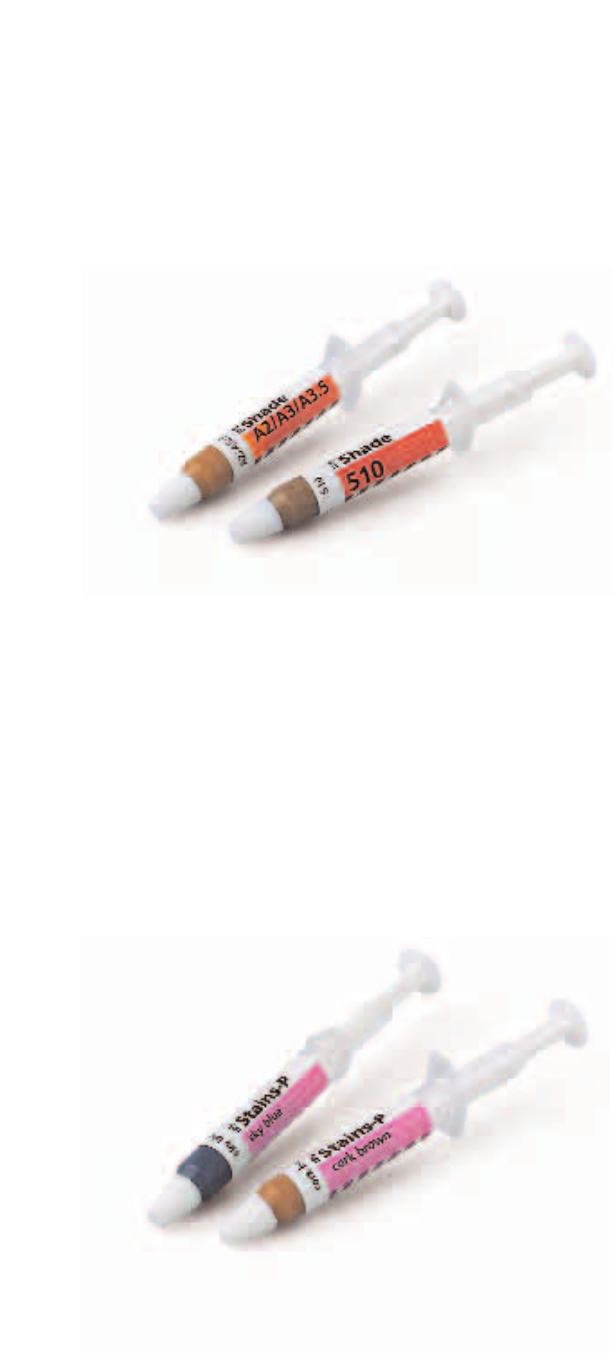
IPS Shade / IPS Shade V
The ready-mixed dentin stains in paste form permit
subsequent modification of shades on the fired ceramic
restoration.
Delivery form
IPS Shade
– IPS Shade, 3 g;
Shades: 110/120, 130, 140/210, 220/230, 240, 310, 320,
330, 340, 410/420, 430/440, 510, 520, 530, 540
IPS Shade V
– IPS Shade V, 3 g;
Shades: A1, A2/A3/A3.5, A4, B1, B2/B3/B4, C1/C2, C3/C4,
D2/D3, D4
IPS Stains-P
These stains in paste form permit easy, individualized charac-
terization of the restorations. The countless possibilities of
mixing the shades ensure virtually unlimited creativity.
Delivery form
IPS Stains-P
– IPS Stains-P, 3 g;
Shades: white, bamboo, caramel, copper, cork, mahogany,
azure, black, orange, basic yellow, basic red, basic blue
21
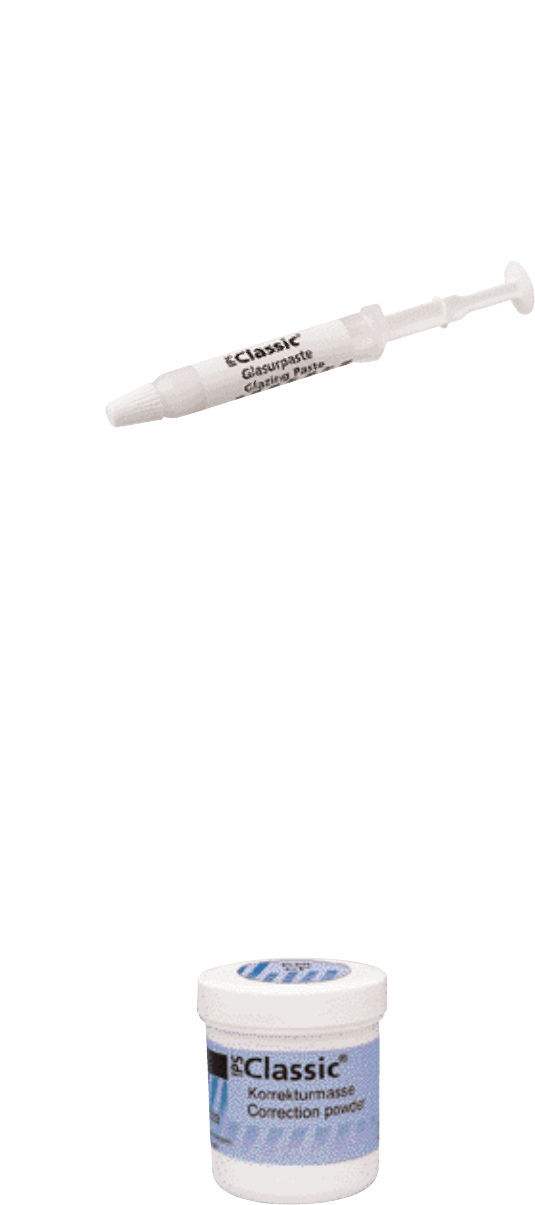
IPS Classic Glazing Paste
Easy-to-use glazing material in paste form for a true-to-
nature gloss on ceramic restorations.
Delivery form
IPS Classic Glaze
– 5 x 3 g IPS Glazing paste
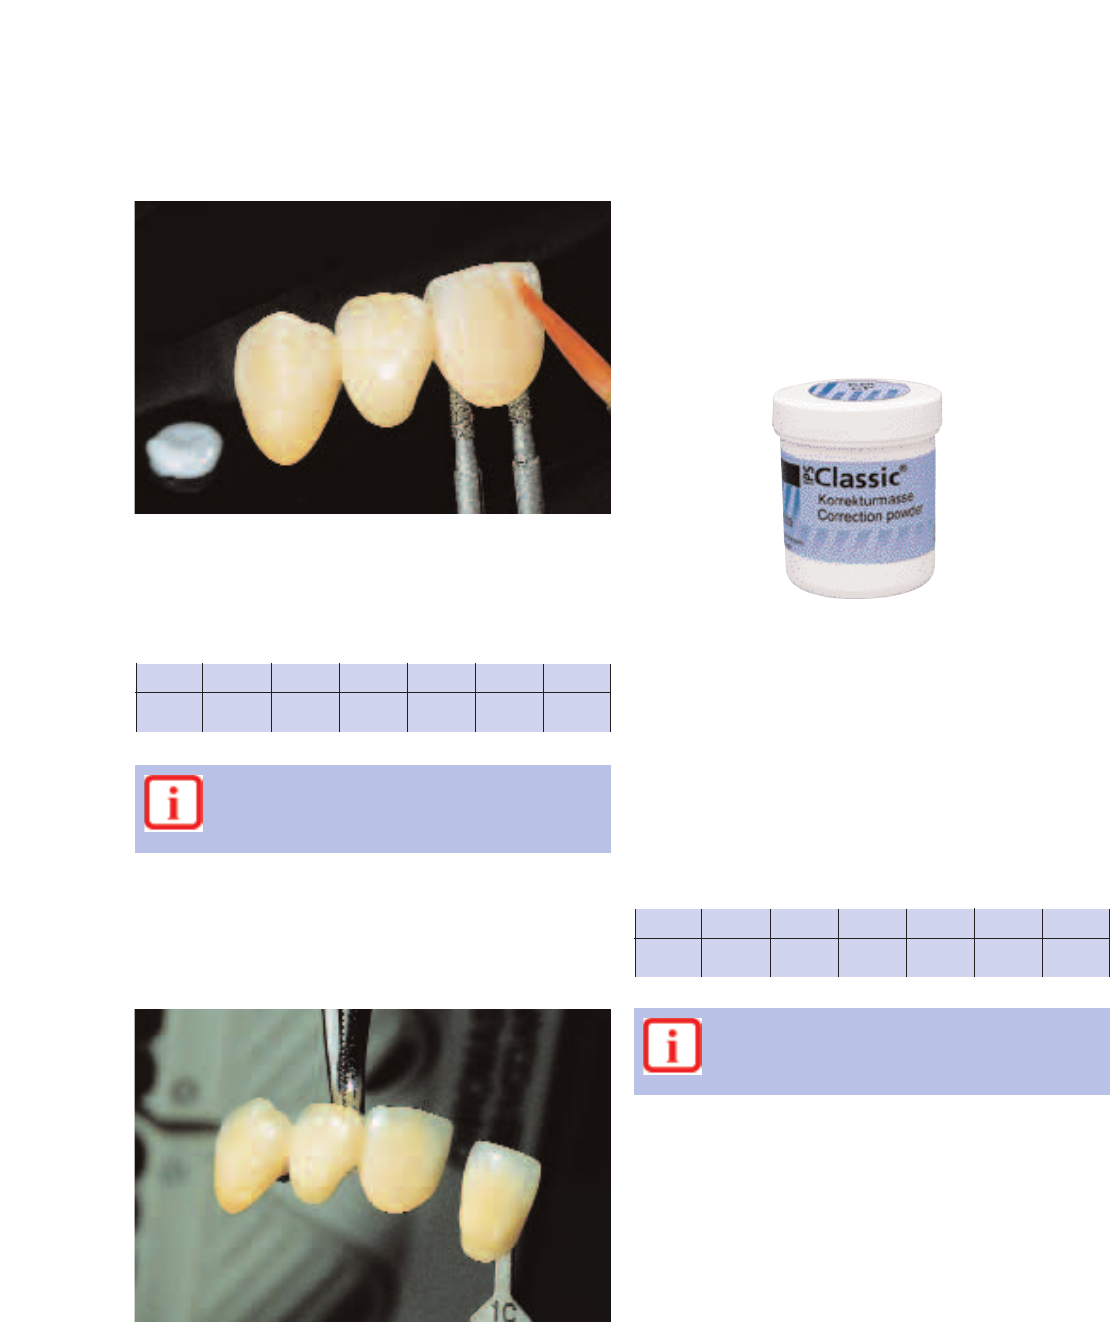
IPS Classic Correction Powder
The low-fusing correction powder for IPS Classic and
IPS Classic V ceramics is particularly suitable for small
corrections and shape adjustments of completely fired
restorations.
Delivery form
IPS Classic Correction Powder
– IPS Correction Powder, 20 g; shade: neutral
22
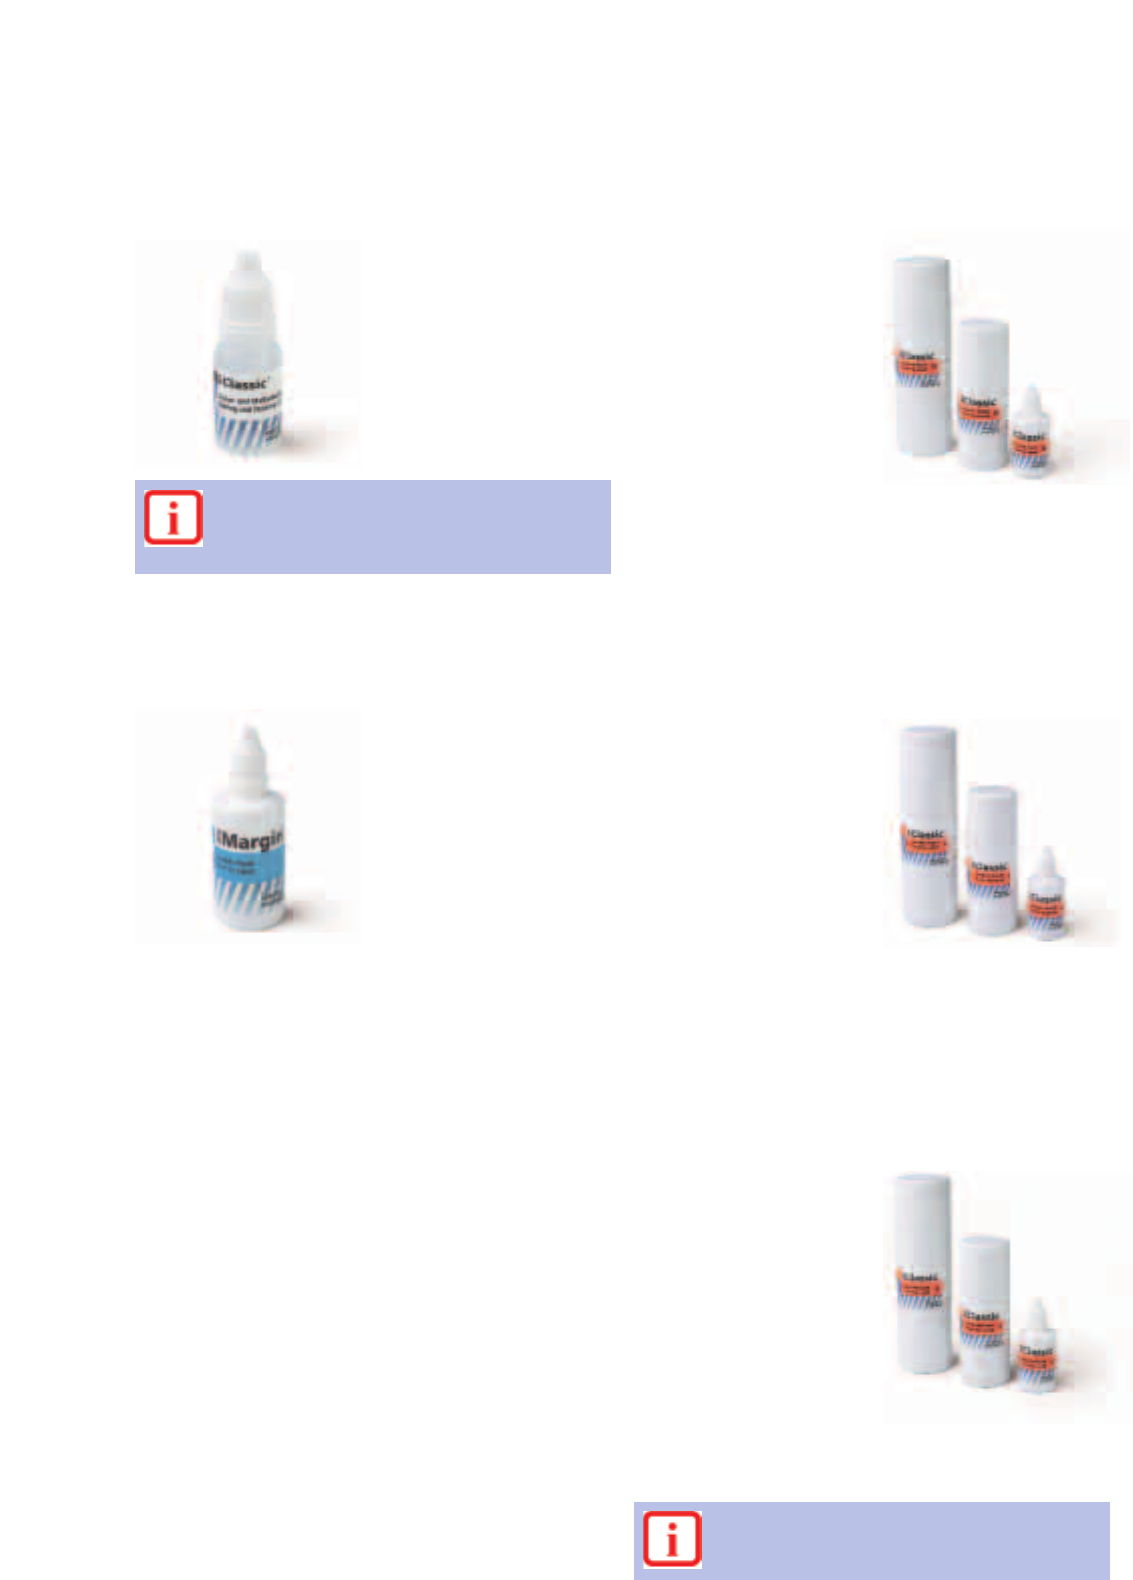
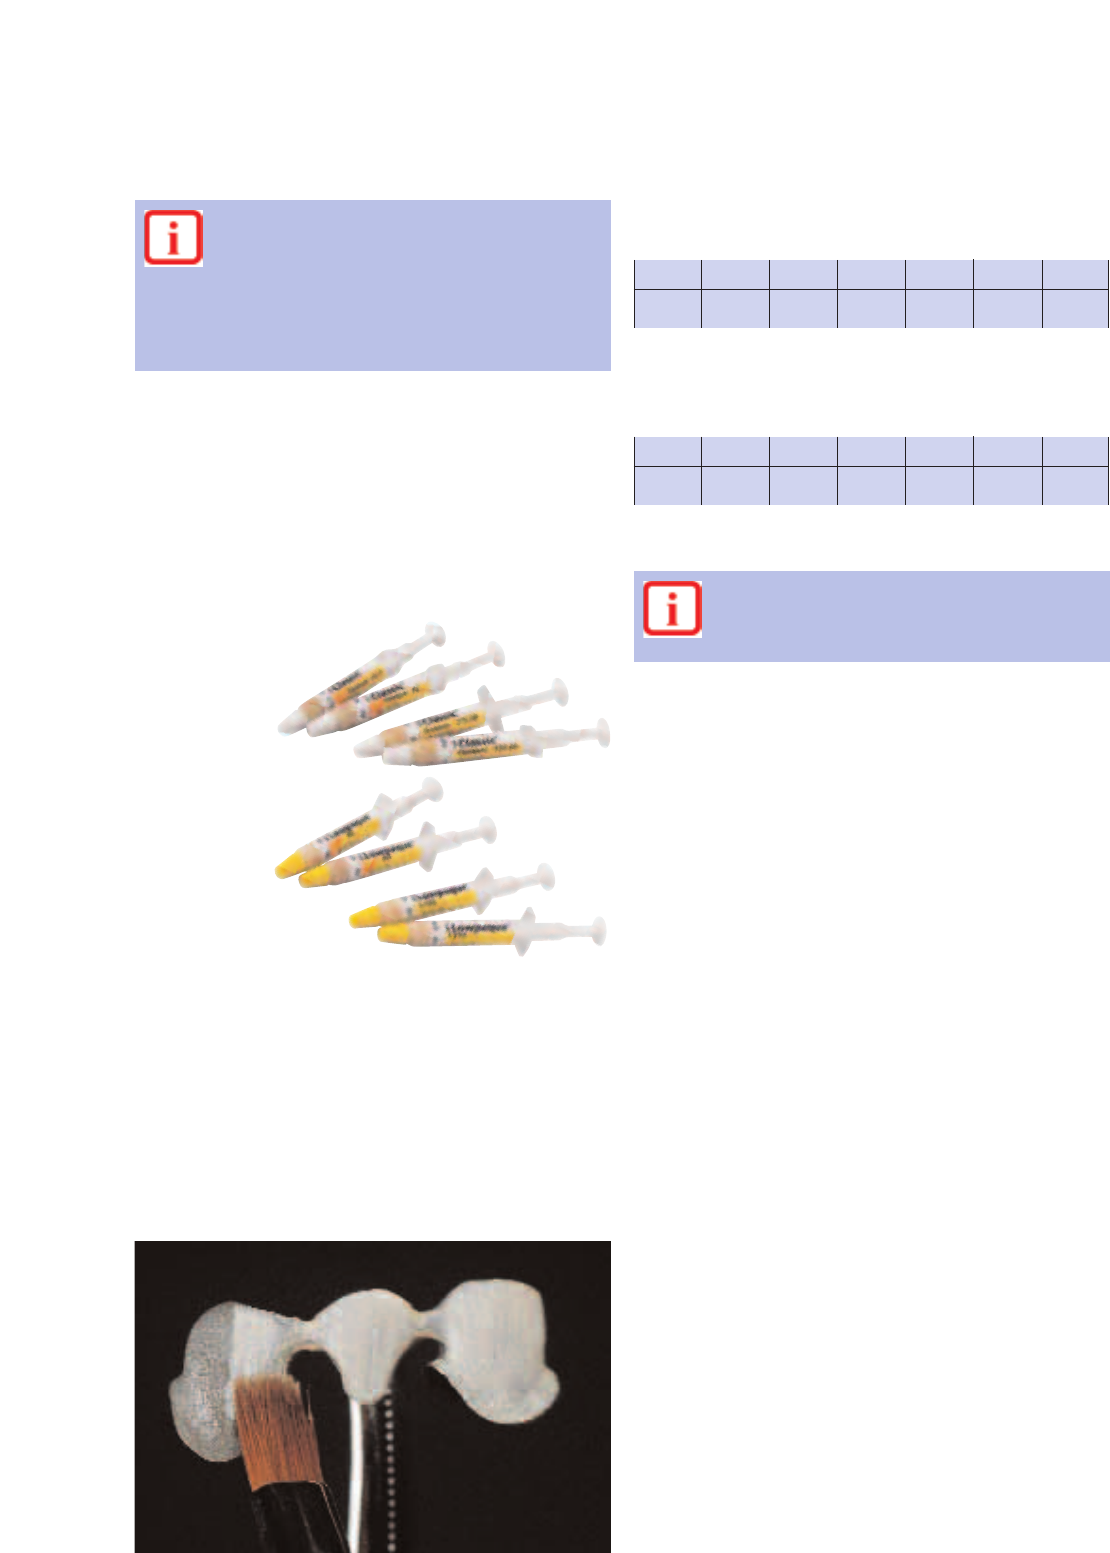
IPS Classic Glaze and Stain Liquid, 15ml
This liquid is used to adjust
the consistency of
IPS Shades, IPS Shades V,
IPS Stains P and IPS Classic
Glaze.
IPS Classic Build-Up Liquid N (Normal), 60 ml, 250 ml and
500 ml
This build-up liquid is
particularly suitable for
technicians who apply small
amounts of ceramic material
using the brush. It provides
enhanced stability and has
excellent modelling
properties. The Build-up
Liquid N is particularly
suitable for those who prefer
a moist working consistency
without constantly rewetting
the ceramic material. As
indicated by the description
‘N’ (normal liquid) this build-
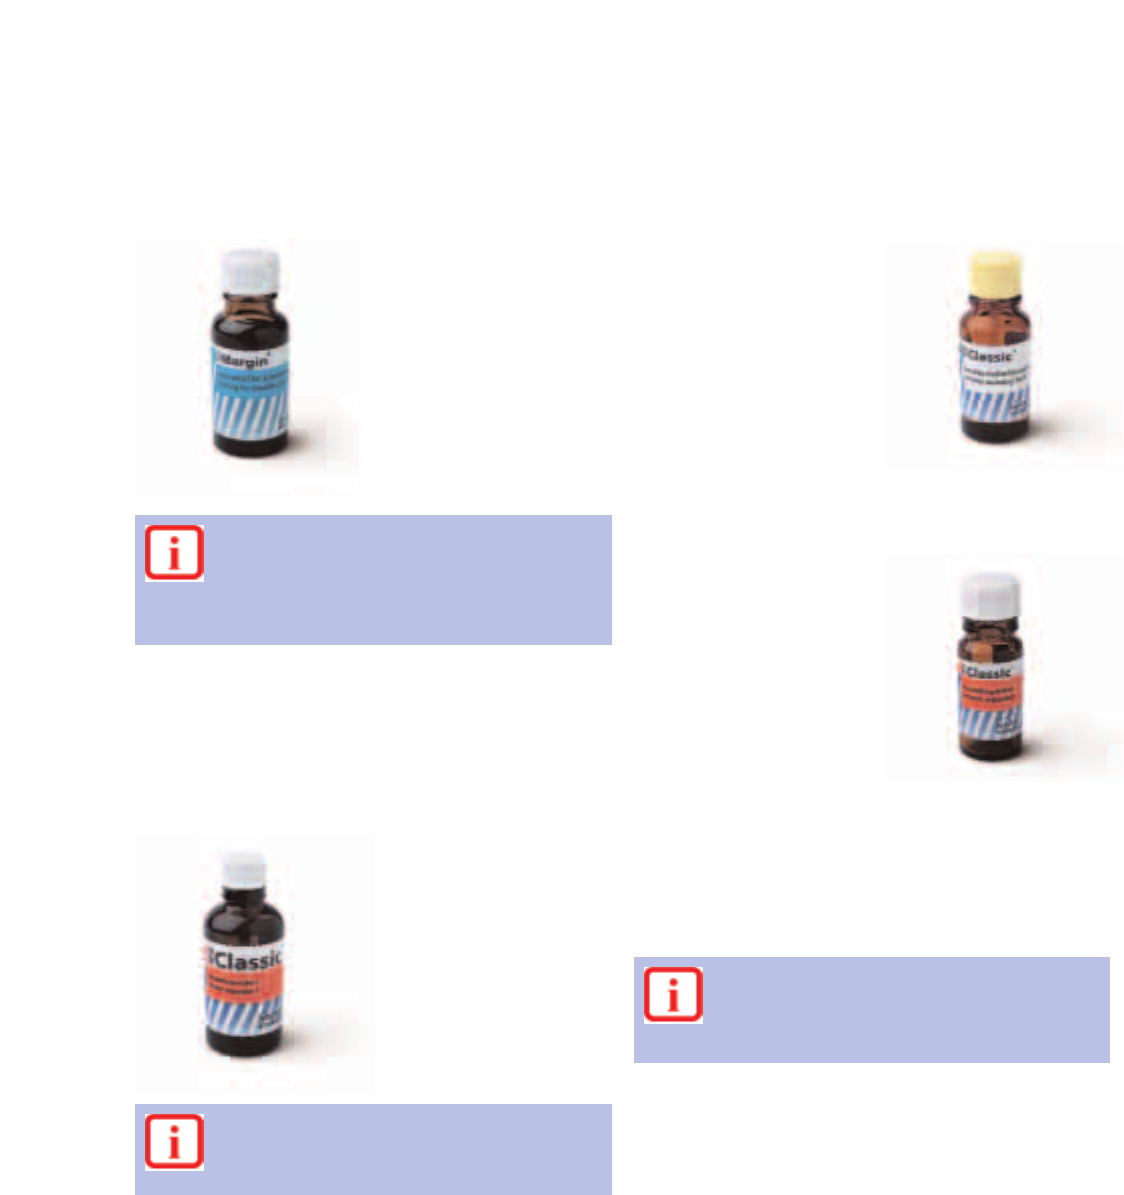
IPS Margin Build-Up Liquid, 60 ml
This special build-up liquid
facilitates the build-up of
ceramic shoulders. Due to a
subsequent setting the use
of this liquid enables an easy
removal of the contoured
crown from the working die.
Classic – Liquids
IPS
IPS Classic Build-Up Liquid L (Long Term), 60 ml, 250 ml
and 500 ml
This liquid has been
developed for technicians
who desire a longer working
time and for markets in
warmer regions. A
component has been added
to the Build-up Liquid ‘L’
which increases the boiling
point and enables the liquid
to evaporate at a slower
pace. This results in a pro-
longed working time while
preserving the excellent
modelling properties.
IPS Classic Build-Up Liquid S (Spatula Technique), 60 ml,
250 ml and 500 ml
This liquid is particularly
suitable for technicians who
tend to strongly condense
the materials, use blotting
material and subsequently
reduce the restorations using
an instrument. The liquid is
easily blotted from the con-
toured crown. This results in
a relatively solid material
which can be shaped with a
suitable instrument.
up liquid is intended for
daily use and for most
layering techniques.
IPS Classic Glaze and Stain Liquid contains ethylene
glycol and is hazardous to health. Do not inhale
vapours. Avoid skin and eye contact.
IPS Build-up Liquids N, L and S can be diluted with
distilled water.
23
IPS Margin Isolating Liquid, 20 ml
This isolating liquid has been
developed to ensure easy
removal of the contoured
shoulder from the die. It
forms a water-repellent film
on the surface, thus
preventing liquids from
seeping into the stone die.
IPS Classic Ceramic Separator contains butylene
acetate. Do not inhale the vapours. Butylene ace-
tate is highly flammable. Keep material away from
open fire.
IPS Margin Isolating Liquid contains hexane.
Hexane is highly flammable and detrimental to
health. Avoid contact of the material with skin and
eyes. Do not inhale the vapours. Keep the material
away from the open fire.
IPS Classic Model Separator contains ethyl acetate.
Ethyl acetate is highly flammable. Do not inhale the
vapours. Keep material away from open fire.
IPS Classic Model Separator I, 50 ml
This separator is ideally used
for sealing the stone models
used for ceramic work. The
Model Separator keeps the
ceramic materials moist.
Within approx. 2 minutes
the applied liquid has dried
and the pores of the stone
are sealed.
IPS Classic Ceramic Isolating Liquid, 50 ml
The Ceramic Isolating Liquid
ensures reliable separation of
the ceramic material and
stone model. The liquid is
used once the stone has
been sealed using the Model
Separator or the IPS Margin
Isolating Liquid.
IPS Classic Ceramic Separator, 10 ml
Ceramic Separator is used in
situations where two ceramic
layers need to be separated.
Furthermore, it is excellently
suitable to isolate the
ceramic material during
soldering (to protect the
ceramic surface from flux).
The Ceramic Separator
varnish fires without leaving
residue. It is important,
particularly with overlapping
teeth, to first complete
and fire one tooth and
subsequently to cover it with
the Ceramic Separator.
Then, contour the adjacent
overlapping tooth onto the
fired one. In this way, a
clean separation between
the two ceramic layers is
achieved after firing.
IPS
24
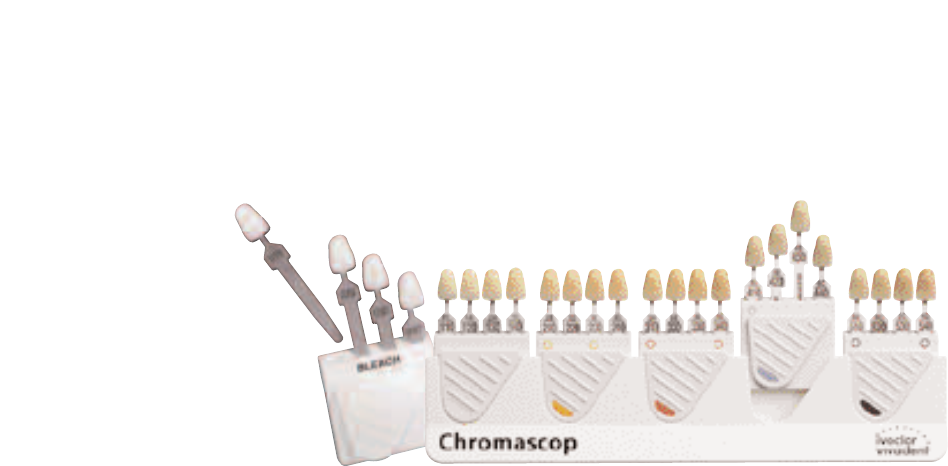
The Chromascop shade
guide represents the shade
standard for Ivoclar Vivadent
products. With the logical
arrangement of the
individual shades, the
Chromascop permits exact
and efficient shade deter-
mination. The 20 shades are
divided into five detachable
shade groups. Once the
basic shade has been
selected, the correct shade
within the shade group can
be determined. Ignoring any
superfluous effects (e.g.
cervicals, transparent areas,
intensive discolouration in
the incisal and dentin
areas, as well as surface
characterizations) makes it
much easier to determine
the correct shade. The follo-
wing Ivoclar Vivadent pro-
ducts are coordinated with
the Chromascop shade
guide:
– IPS d.SIGN
– IPS Empress
– IPS Empress 2
– IPS Eris for E2
– SR Ivocron
– SR Antaris/SR Postaris
tooth line
–Tetric Ceram
restorative materials
Classic – Shade selection
25
Classic – Layering diagram
IPS
Chromascop

26
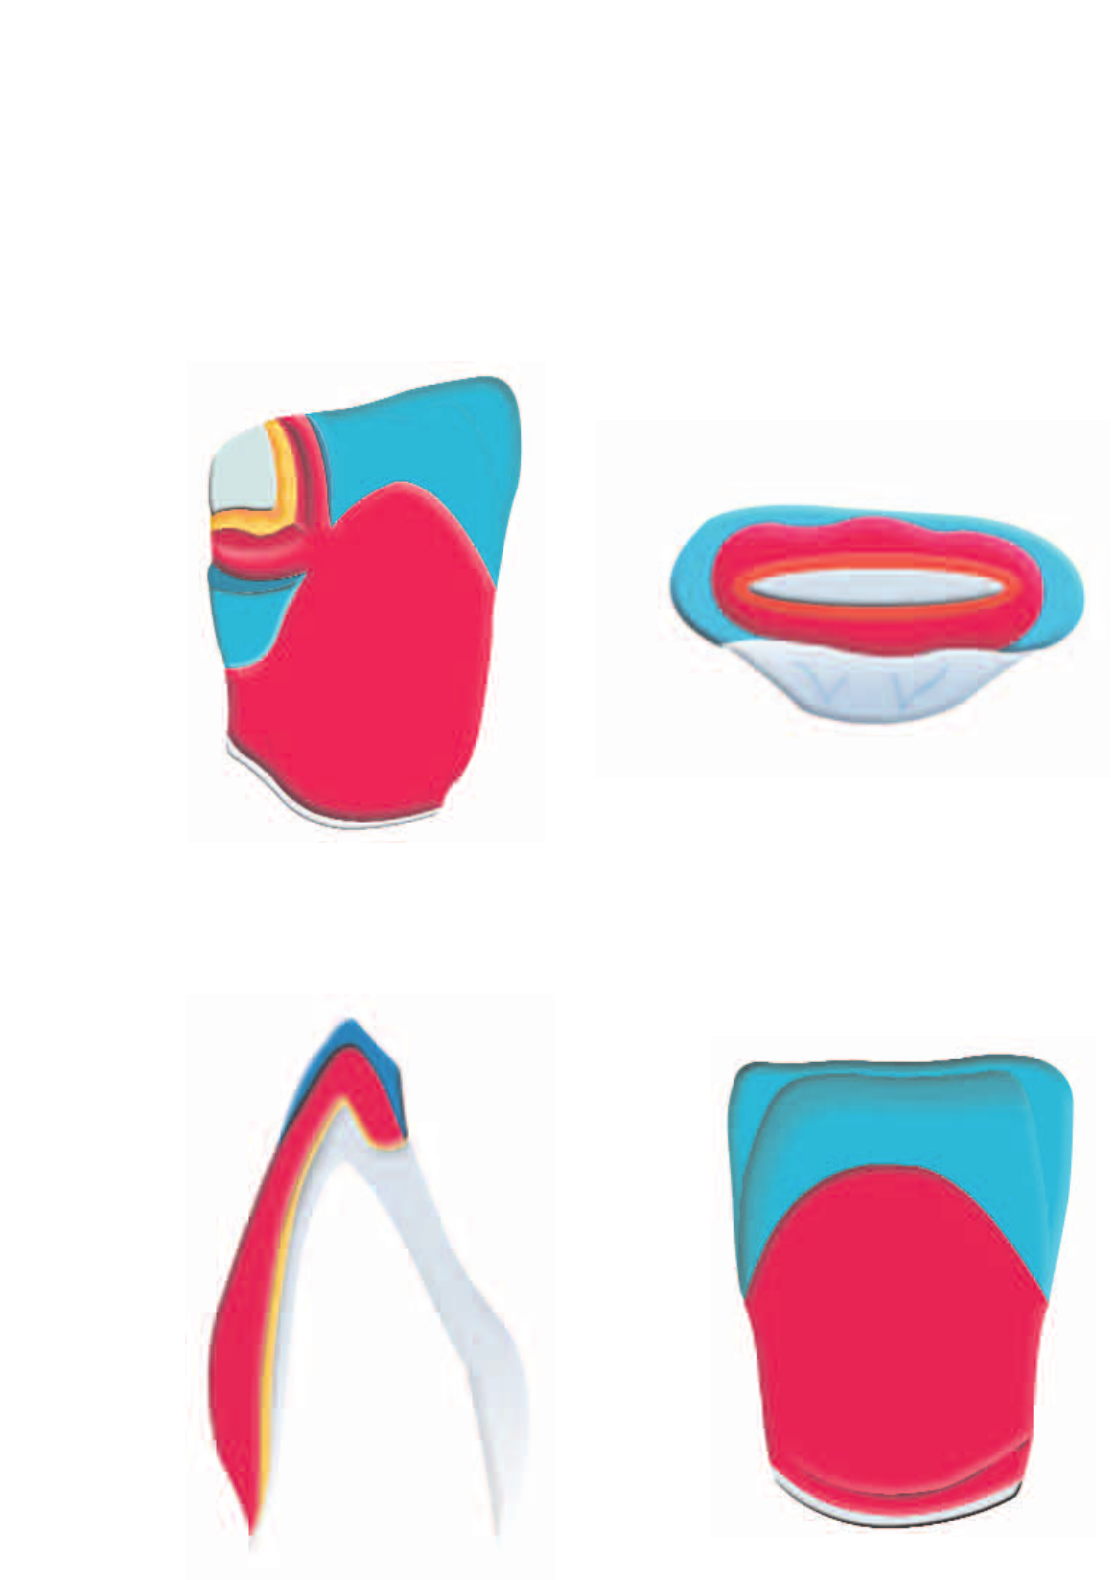
Classic – Framework design
IPS
1. Functional support of the veneering ceramic
2. Framework design for ceramic shoulders
3. Framework stability
4. Framework design for bridges
5. Design of bridge pontics
6. Interface between metal and ceramic
When designing frameworks to be
veneered with ceramic materials, the
following parameters have to be
observed:
27
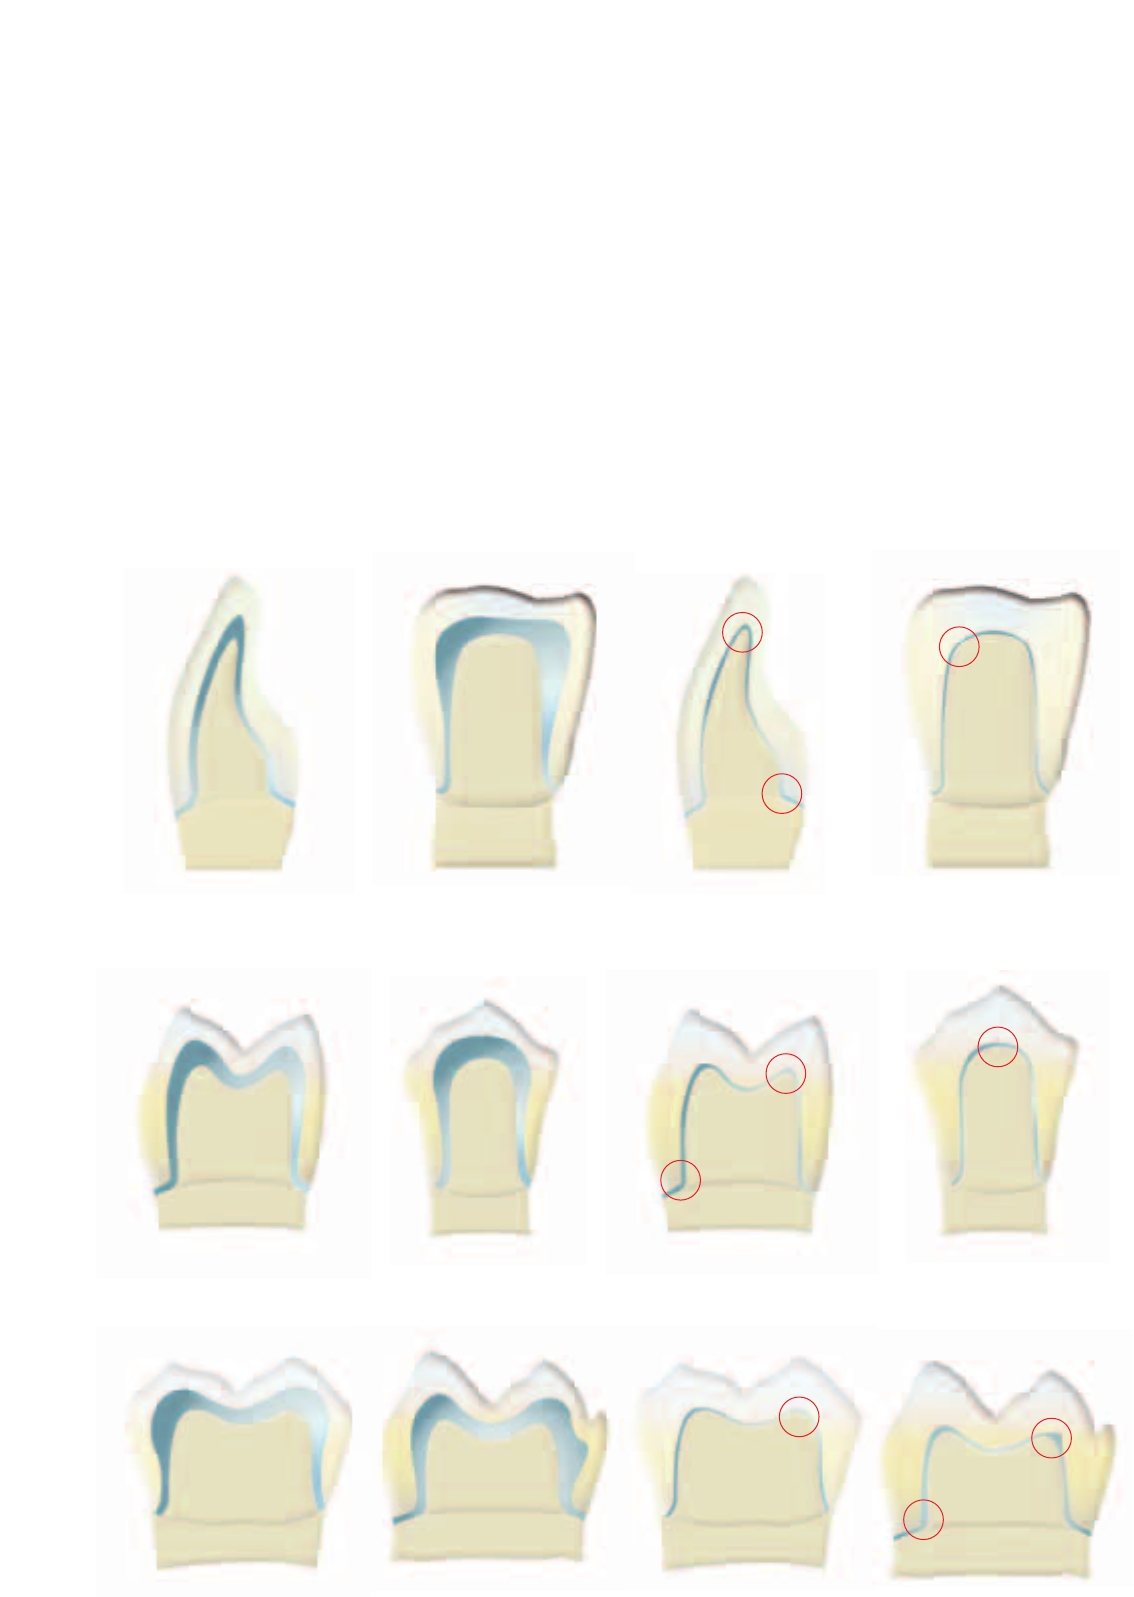
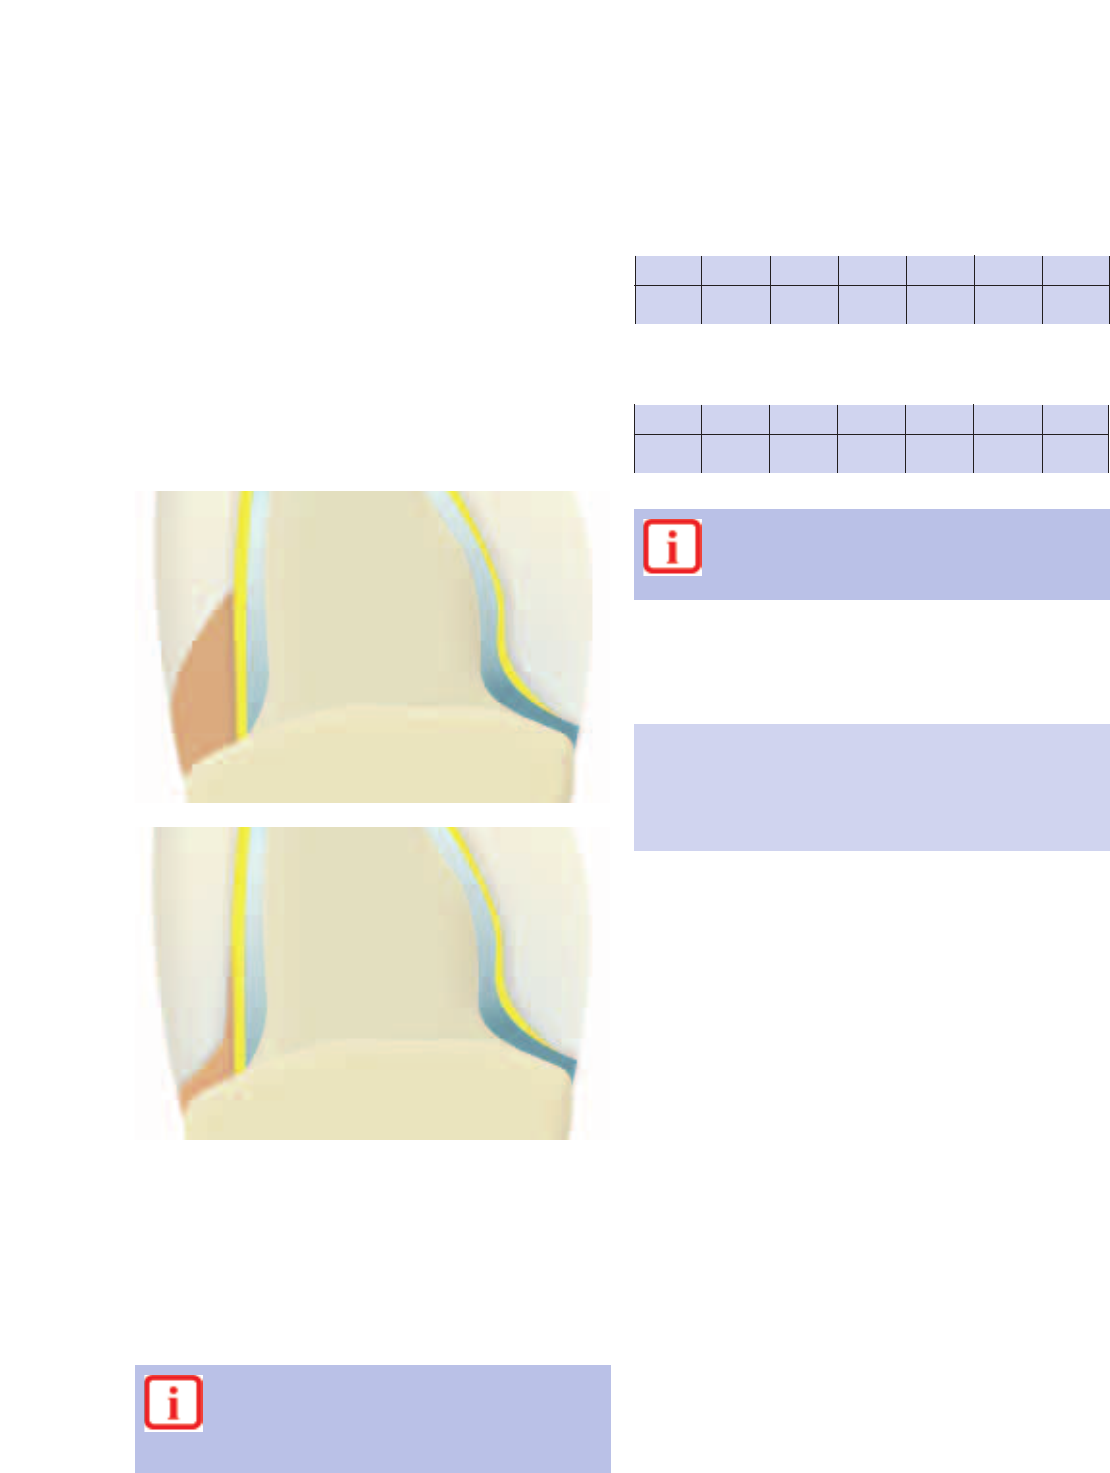
The framework should reflect the shape of the tooth in a
reduced form. Therefore, the framework should be designed
in such a way that it supports the cusps so that an even
layer of the veneering ceramic can be used in the cusp/
fissure area. In this way, the masticatory forces are exerted
on the framework rather than on the veneering ceramic.
Furthermore, the framework should not have any sharp
angles or edges (see diagram), so that the masticatory forces
Anterior crowns
correct incorrect
do not cause delamination or cracks. Sharp angles or edges
should be rounded out in the wax-up so that the minimum
framework thickness is not compromised. The wall thickness
of the metal framework for single crowns after finishing
should be at least 0.3 mm and 0.5 mm for bridge
abutments (see diagram). For further information, please
refer to the Instructions for Use of the alloy being used.
1. Functional support of the veneering ceramic
Premolar crowns
Molar crowns
correct incorrect
correct incorrect
28
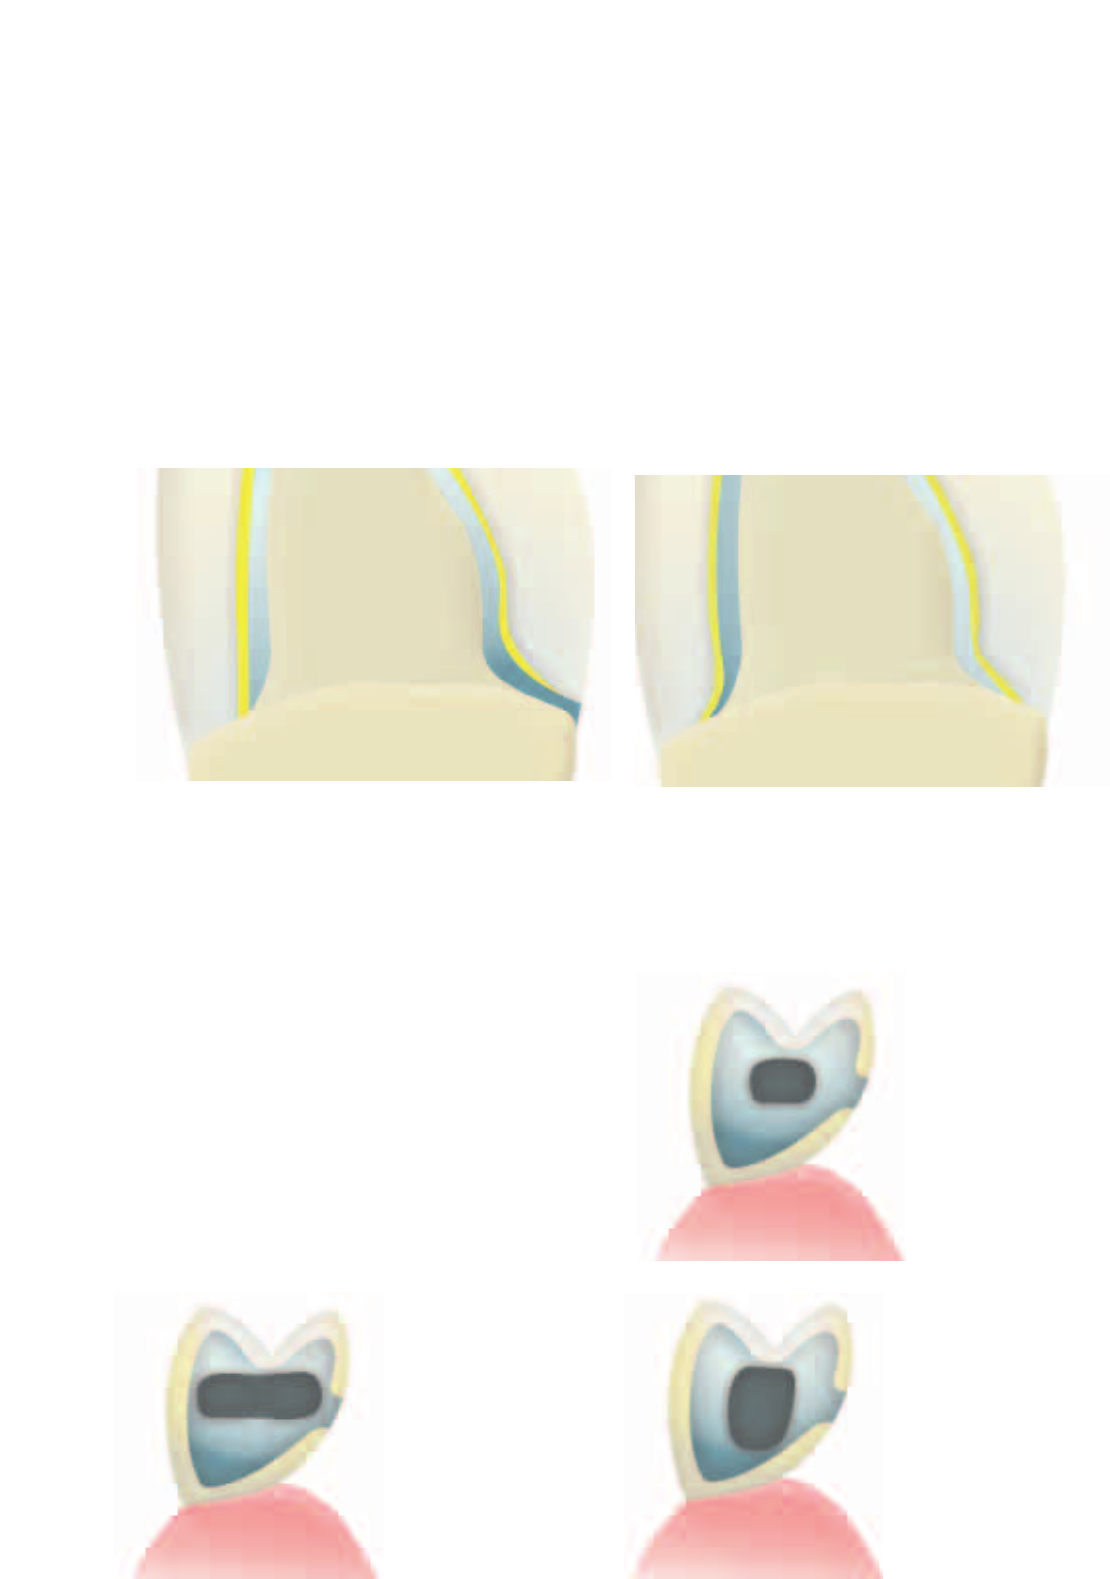
When fabricating porcelain shoulders, make sure that the
framework is supported by the prepared tooth rather than
by the veneer. To achieve this, the framework is reduced to
the inner edge of the chamfer or shoulder preparation. In
this way, functional support of the framework by the tooth
is achieved. A framework that accurately fits on the
prepared tooth is essential in order to keep the ceramic
material from getting on the inner surface of the framework.
2. Framework design for porcelain shoulders
incorrect
correct
Single connector width
= single stability
Double the width of
the connector
= double the strength
Double the height of the
connector at single width
= eightfold the strength
3. Framework stability
The dimensions of the interproximal connector greatly
influences the stability of the restoration during the
laboratory procedure, as well as the clinical long-term
success after cementation. Therefore, the dimensions of the
connector areas must be adequate for the alloy being used.
(This is especially important if a bio-alloy or high-gold alloy is
to be used.) Additionally, the thermal behaviour of the alloy
chosen has to be observed when applying the material
during laboratory procedures.
29
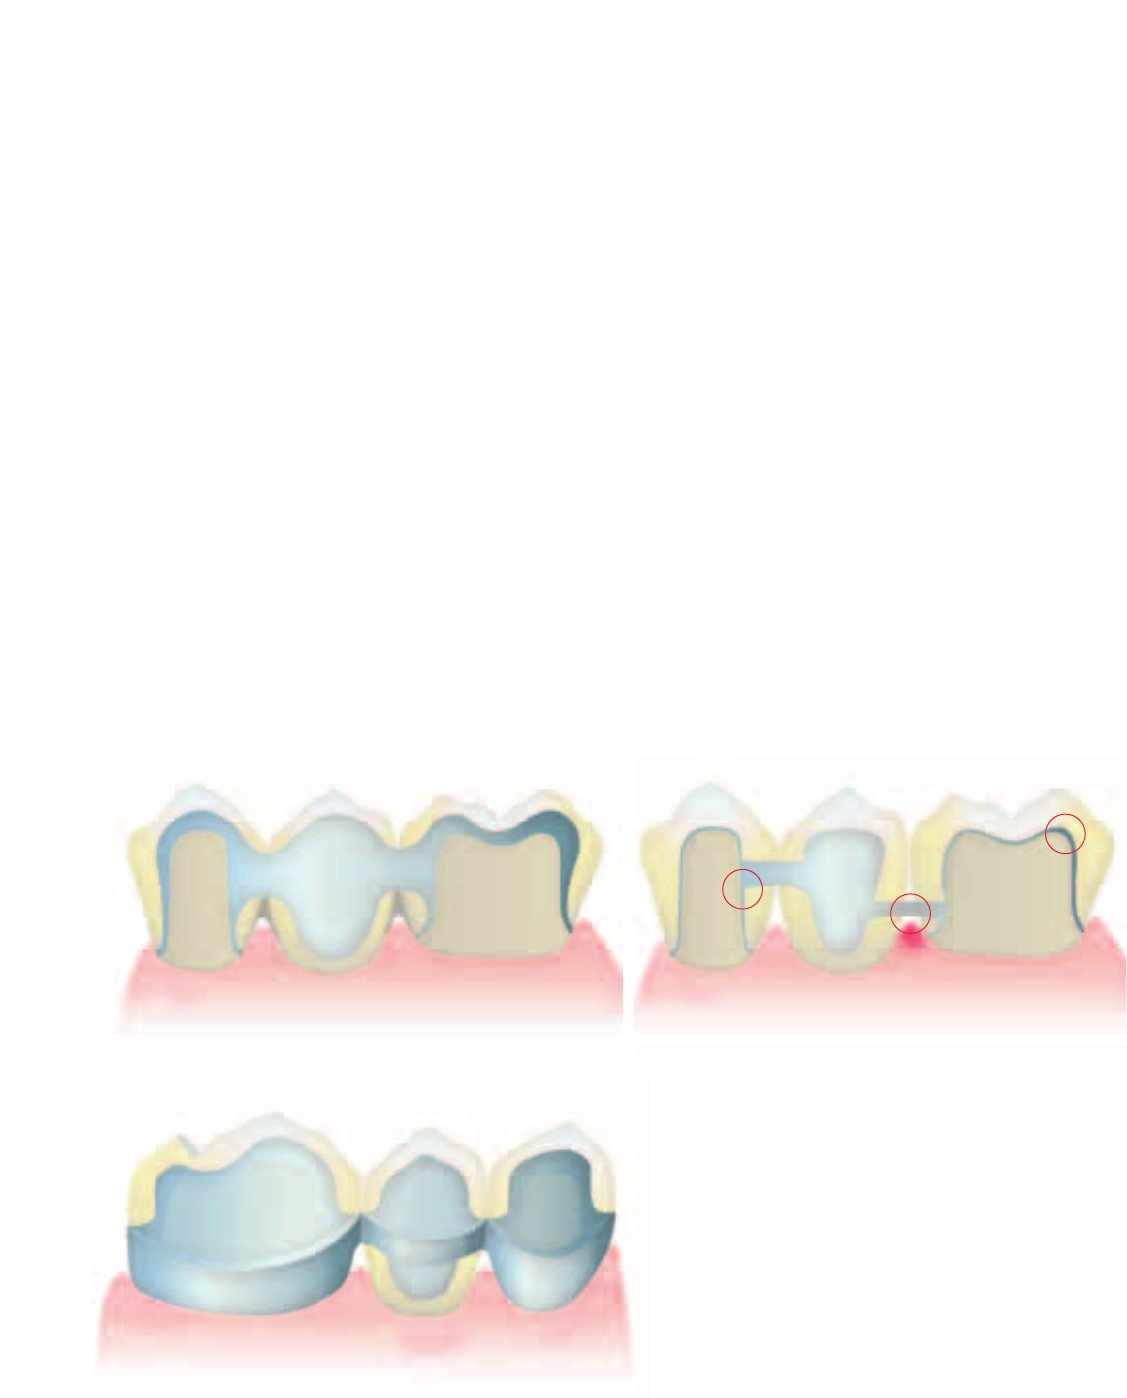
Frameworks veneered with ceramic materials are subject to
thermal stress during the firing procedures and to
masticatory stress after cementation. Therefore, the
corresponding forces must be transferred to the framework
rather than the veneer. In particular, adequate framework
thickness must be ensured in the connector area between
the abutment and the pontic.
The design of the framework must meet the visual,
functional and periodontal hygiene requirements of the
patient. A functional wax-up reduced to allow space for the
ceramic material is the optimum prerequisite. During the
ensuing laboratory procedures, the framework is repeatedly
exposed to high temperatures. These firing temperatures
may cause the framework to distort and compromise the
accuracy of fit if it has not been properly designed and the
required thickness observed. A scallop-type design with
interproximal reinforcements will provide the necessary
strength needed to avoid deformation of the framework.
Also, this type of framework design (e.g. with cooling vents)
will ensure even cooling of the restoration once it is removed
from the ceramic furnace after firing. This is particularly
important if bio-alloys or high-gold alloys are used. The
corresponding failures can be prevented as described under
point 1.
In order to ensure proper oral hygiene with bridges, the
design of the interdental areas should be given special
attention. Adequate opening of the interdental area should
be considered when designing the framework without
creating black triangles. In this way, periodontal hygiene may
be performed using interdental brushes and dental floss.
4. Framework design for bridges
correct
correct
incorrect
30
Bridge pontics are designed taking aesthetic and functional
aspects into account as well as oral hygiene. The area of the
pontic that contacts the alveolar ridge should be made of
ceramic. In order to ensure adequate stability between
bridge pontic and the bridge abutments, a palatal and/or
lingual scallop is recommended. Furthermore, to ensure even
cooling of the bridge pontic that absorbs the most heat,
cooling vents are advantageous.
5. Design of bridge pontics
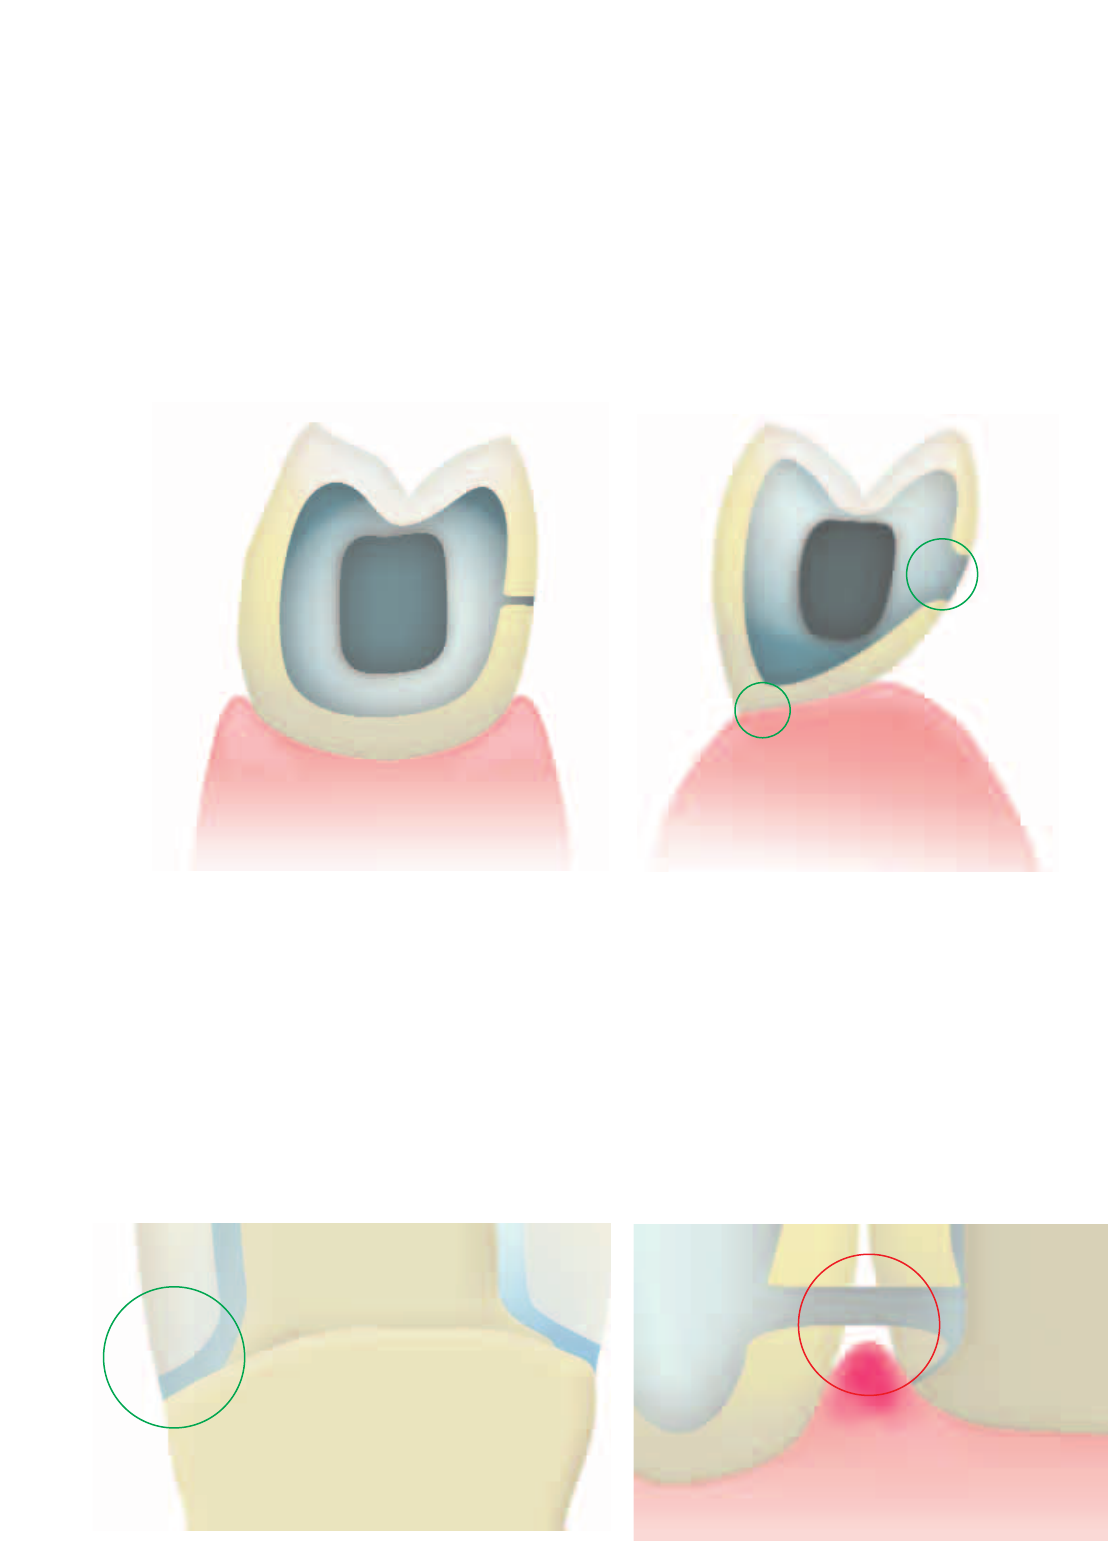
The interface between the metal framework and the
veneering ceramic must be clearly defined and, if possible,
incorporate a right angle finish line. The juncture between
the metal framework and the veneering ceramic must not
be located in the contact area, nor on surfaces involved in
masticatory functions. Furthermore, make sure that the
interface in the marginal area does not come into contact
with the gingiva, particularly if a tapered crown margin is
designed (e.g. no metal margin and no ceramic shoulder). In
this way, irritation of the gingiva can be prevented. The
interface in the interdental area should be designed in such
a way that cleaning of these areas is possible.
6. Interface between metal and ceramic
Bridge pontic design - ovate pontics Bridge pontic design - saddle-type pontics

31
Classic – Instructions for Use
IPS
Oxide firing
After grinding, carefully blast the framework with type
100 aluminium oxide Al
2
O
3
(Ivoclar Vivadent special jet
medium). The required pressure is 1.5–2.0 bar.
– Use only disposable, pure Al
2
O
3
to blast the alloy surface.
– Observe the Instructions for Use of the alloy manufacturer.
Blasting improves the mechanical bond. It results in the
object surface being roughened and considerably enlarged.
In order to prevent inclusions of blasting medium residue in
the ceramic, we recommend blasting the alloys with the
indicated pressure while keeping the nozzle at a flat angle to
the object surface. A contaminated metal surface may result
in the formation of bubbles during ceramic firing. When
finishing the frameworks, the instructions of the alloy
manufacturer must be observed at all times. Oxidation is
carried out according to the instructions of the alloy
manufacturer.
Starting situation
Fabricate a master model or a model with detachable
segments on the basis of the impression in the usual manner.
It is advisable to apply a sealer to harden the surface and to
protect the die. The application of a sealer must not cause
any changes in the dimensions of the die. After that, a
spacer may be applied in the usual manner.
Fabricating the framework
Fabricating the framework
When fabricating the framework, make sure that the
minimum wall thickness after finishing is 0.3 mm for single
crowns and 0.5 mm for bridge abutments. These dimensions
are the prerequisite for the stability of the metal framework
and the durable bond between the metal and ceramic
material. If the stipulated framework and connector
dimensions are not observed, the resulting stress within the
material will lead to delamination of the ceramic material
and distortion of the framework.
Recommended procedure
1. Complete modelling of the anatomical tooth shape
2. Reduce to make room for the veneering materials
3. Waxing of the contact points and connector areas
4. Checking the occlusal and proximal contact points
Contouring
The framework reflects the reduced anatomical tooth shape
(functional support of the veneering ceramic). In this way, the
ceramic material may be applied in even layers and is
adequately supported. For that purpose, the properties of
the different alloys (e.g. firing stability) must be taken into
consideration.
– Undersized metal frameworks result in increased shrinkage
of the veneering ceramic and require additional corrective
firings.
– If the metal framework is too small, the veneering ceramic
is not adequately supported, which may lead to cracks and
delamination, particularly in very thick ceramic layers.
Finishing the metal framework
The cast metal framework is finished using tungsten carbide
metal burs or ceramic-bonded grinding instruments. The
marginal area of the framework is reduced up to the inner
edge of the chamfer or shoulder preparation (labial or
circular) to make room for the ceramic shoulder.
– Use reduced pressure when working with softer alloys.
–Work in one direction only to avoid overlapping and
inclusions in the metal surface.
– Do not use diamond grinding instruments. Diamond
particles may be trapped in the alloy and cause bubbles in
the ceramic material during firing.
Schematic diagram of the
blasting direction
Correct angle for blasting the
alloy surface
Before the oxidation firing, clean the metal framework using
a brush under running water. Then, thoroughly clean it with
steam or in the ultrasonic cleaner. Allow the framework to
dry after cleaning. Oxidize the framework according to the
instructions given by the alloy manufacturer. Provide ample
support for the framework on the firing tray. This is
particularly important for long-span bridges. After oxidation,
carefully check the framework for porosity or irregular oxide
layer. Refinish and reoxidize if necessary.
Apply the first opaquer layer (wash) thinly using a brush.
Firing parameters for the 1
st
opaquer firing (wash
firing) – IPS Classic Opaquer
Firing parameters for the 1
st
opaquer firing (wash
firing) –IPS Lowpaque
Important
If furnaces from other manufacturers are used,
these parameters have to be adjusted accordingly.
32
1
st
opaquer firing (wash firing)
Extrude the desired amount of the ready-to-use opaquer
paste from the syringe and mix thoroughly.
Choose between the
IPS Classic Opaquer
or
IPS Lowpaque
The IPS Classic Glazing and Staining Liquid is used to adjust
the consistency of the paste opaquer and to rewet dried
opaquer that has been used several times. Do not dilute the
material with water.
Apply the first opaquer layer (wash) thinly using a brush.
Smooth out any roughness on the metal surface, since the
wash is the most important connection between the metal
oxide surface and the ceramic.
Some alloy types require pickling after oxide firing
and/or blasting of the oxide layer (observe
instructions of the alloy manufacturer). After that,
thoroughly clean the framework with steam or in the ultra-
sonic bath. Oxidation can be considered a 'cleaning firing'
and is also used to check the quality of the framework
surface.
T
980°C
1796°F
B
403°C
757°F
S
6 min.
6 min.
t
80°C
144°F
H
1 min.
1 min.
V
1
550°C
1022°F
V
2
979°C
1794°F
➚
T
920°C
1688°F
B
403°C
757°F
S
6 min.
6 min.
t
80°C
144°F
H
1 min.
1 min.
V
1
450°C
842°F
V
2
919°C
1686°F
➚
33
Apply Intensive Opaquer onto the desired areas…
Apply the 2
nd
opaquer layer so ...
2
nd
opaquer firing
Apply the second opaquer layer in such a way that the metal
framework is entirely covered with opaquer, i.e. as much as
necessary and as little as possible.
... subsequently, the restoration is fired using the stipulated firing parameters for the second opaquer firing
... that it covers the entire framework
Important
If furnaces of other manufacturers are used, these
parameters have to be adjusted accordingly.
Firing parameters for the 2
nd
opaquer firing –
IPS Classic Opaquer
Firing parameters for the 2nd opaquer firing –
IPS Lowpaque
For each individual situation, five ready-mixed Intensive
Opaquers are available to meet exacting, aesthetic
requirements. The Intensive Opaquers are applied before
the second opaquer firing in the desired areas (e.g. in the
cervical, incisal, occlusal, or palatal area).
The fired opaquer should have a silky-mat appearance
(egg-shell gloss).
T
970°C
1778°F
B
403°C
757°F
S
6 min.
6 min.
t
80°C
144°F
H
1 min.
1 min.
V
1
550°C
1022°F
V
2
969°C
1776°F
➚
T
910 °C
1670 °F
B
403°C
757°F
S
6 min.
6 min.
t
80°C
144°F
H
1 min.
1 min.
V
1
450°C
842°F
V
2
909°C
1668°F
➚
Firing parameters for the 1
st
margin shoulder firing –
IPS Classic Opaquer
Firing parameters for the 1
st
margin shoulder firing –
IPS Lowpaque
Important
If furnaces from other manufacturers are used,
these parameters have to be adjusted accordingly.
Important:
Please consider the different firing parameters of
the margin shoulder firings when using IPS Classic
Opaquer or IPS Lowpaque.
34
1
st
ceramic margin shoulder firing
A ceramic margin shoulder can be fabricated on the metal
framework after the opaquer firing, if the necessary space
has been provided during finishing. First, isolate the stone die
with IPS Margin Isolating Liquid and then, after drying, with
IPS Classic Ceramic Isolating Liquid. After that, generously
apply the IPS Margin material in the desired tooth shade in
the cervical area in the shape of a drop (i.e. the outer surface
of the ceramic material is given a convex shape) and dry.
incorrect
correct
For aesthetically exacting work, eight Intensive Margin
materials are available. They may either be mixed or applied
alone. Subsequently, the framework with the applied and
dried shoulder material is carefully removed from the die.
Tip
When designing a ceramic shoulder (particularly for
bridges), the Margin material may be applied slightly higher
up in the proximal areas. This will reduce the interdental
shrinkage during the subsequent dentin and incisal firings.
T
950°C
1742°F
B
403°C
757°F
S
6 min.
6 min.
t
80°C
144°F
H
1 min.
1 min.
V
1
550°C
1022°F
V
2
949°C
1740°F
➚
T
930°C
1706°F
B
403°C
757°F
S
6 min.
6 min.
t
80°C
144°F
H
1 min.
1 min.
V
1
550°C
1022°F
V
2
929°C
1704°F
➚
Important
Please do not forget to consider the different firing
parameters of the 2
nd
margin shoulder firing as
well when using IPS Classic Opaquer or
IPS Lowpaque.
35
2
nd
margin shoulder firing
After the firing, the margin shoulder may have to be slightly
adjusted by grinding. The accuracy of fit (sinter shrinkage)
has to be reestablished by means of a 2
nd
margin shoulder
firing. Use the same Margin materials as for the 1
st
margin
shoulder firing for that purpose.
First, however, isolate the die again with IPS Classic Ceramic
Isolating Liquid. Then, supplement the missing areas by
carefully applying the margin material in the space resulting
from the 1
st
margin shoulder firing, thus providing optimum
accuracy of fit of the ceramic margin shoulder. After that,
complete the margin shoulder, dry, carefully remove the
framework from the die, and place it on the firing tray.
Firing parameters for the 2
nd
margin shoulder firing –
IPS Classic Opaquer
Firing parameters for the 2
nd
margin shoulder firing –
IPS Classic Lowpaque
Important
If furnaces of other manufacturers are used, these
parameters have to be adjusted accordingly.
1
st
dentin and incisal firing
Before layering the dentin and incisal materials, sealing the
model is a very important working step. In this way, the
ceramic material is prevented from drying out or sticking to
the model. Use the IPS Classic Model Separator I, followed by
the IPS Classic Ceramic Isolating Liquid to seal the stone die
and the adjoining areas of the model.
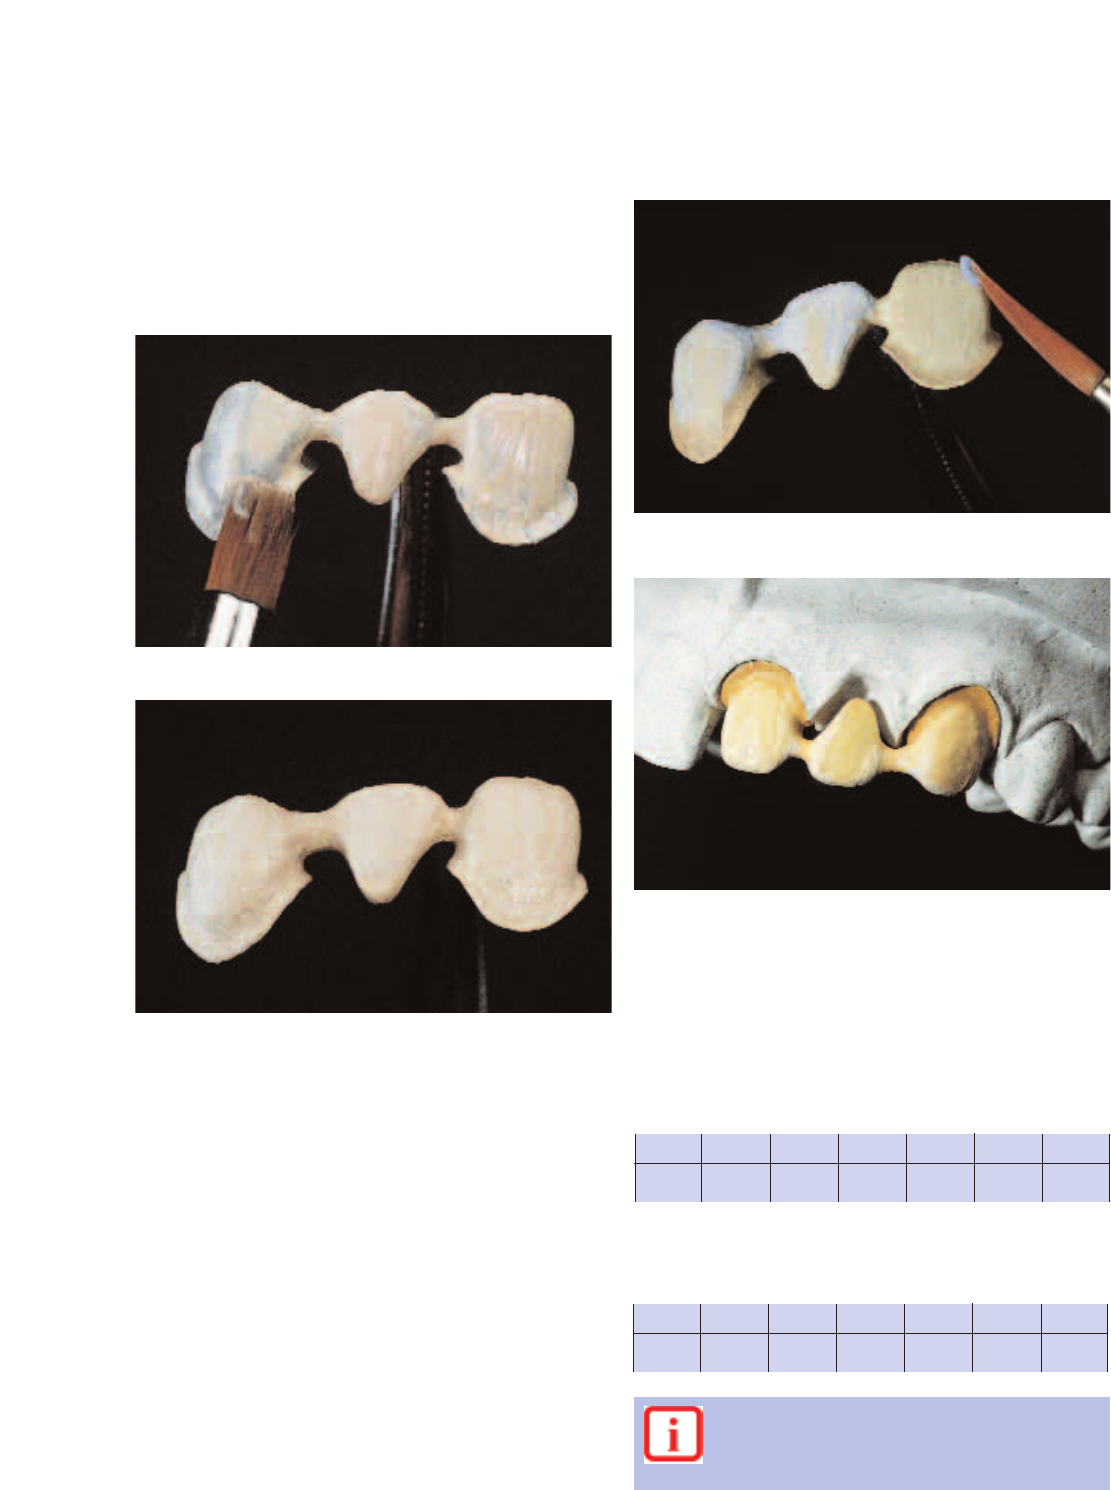
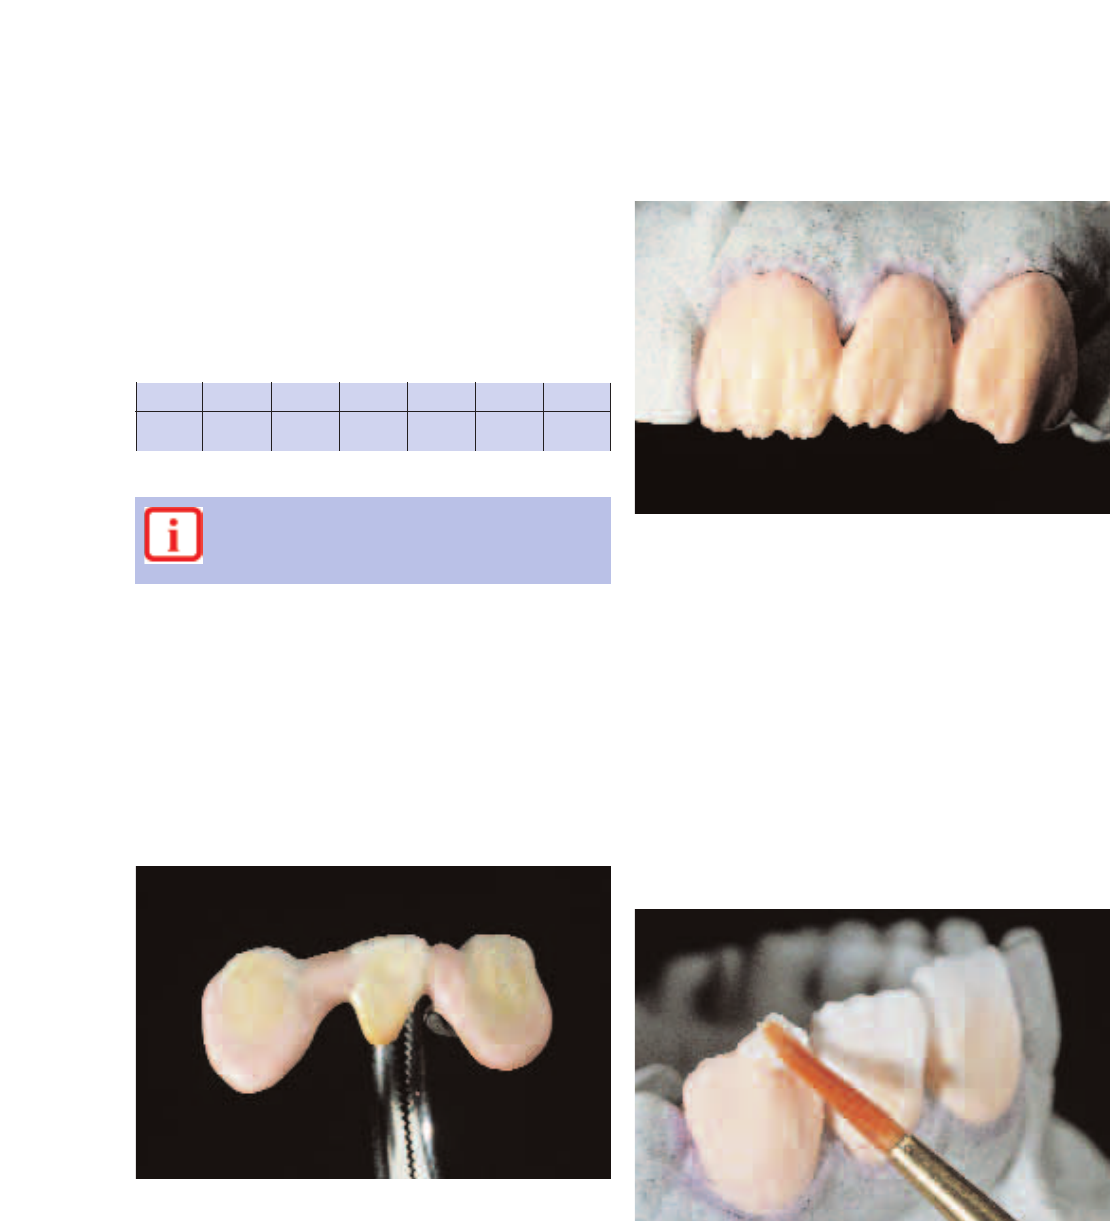
A small quantity of IPS Opaque Dentin is applied in the cervical and interdental area………
Isolating the model with the IPS Classic Model Separator I and the IPS Classic Ceramic Isolating Liquid.
……and is slightly roughened to reach a better adaption of the ceramic material on the opaquer surface.
To achieve an optimum bond between the ceramic materials
and the opaquer surface, apply the IPS Opaque Dentin or
Dentin material in small increments, particularly in the
cervical and interdental areas (for bridges) and slightly
roughen it. In this way, the adaption of the Deep Dentin or
Dentin materials on the opaquer surface is enhanced.
T
940°C
1724°F
B
403°C
757°F
S
4 min.
4 min.
t
80°C
144°F
H
1 min.
1 min.
V
1
550°C
1022°F
V
2
939°C
1722°F
➚
T
930°C
1706°F
B
403°C
757°F
S
4 min.
4 min.
t
80°C
144°F
H
1 min.
1 min.
V
1
550°C
1022°F
V
2
929°C
1704°F
➚
36
Firing parameters for intermediate firing –
IPS Opaque Dentin
Layered IPS Classic Dentin material, where the mamelon shape is only outlined ...
….then, Incisal and Transparent material is applied in small portions and the anatomical shape is completed
by means of over-contouring.
IPS Opaque Dentin layering to enhance the shade in the cervical area
Important
If furnaces of other manufacturers are used, these
parameters have to be adjusted accordingly.
In order to achieve true-to-nature shade effects in areas
where space is limited, IPS Opaque Dentin materials are
used. They are directly applied on the opaquer layer. For
pontics and crowns margins thinning towards the metal,
IPS Opaque Dentin material of the appropriate tooth shade
is applied in the cervical or basal area to enhance the shade.
Next, outline the mamelon area with a layer of Dentin
material. Another option is to contour the full anatomical
shape of the tooth. If this procedure is used, the contoured
crown has to be reduced in the labial, incisal-mesial and
distal areas. The mamelon shape is, once again, only
outlined.
Irrespective of the method used, make sure to provide
adequate space for the subsequent application of the Incisal
and Transparent materials.
Depending on the patient’s situation, an individual and
simple build-up using Mamelon, Effect and Transparent
material in the incisal third can be made to achieve the best
possible aesthetic result.
The palatal fossa of the restoration is covered with
IPS Opaque Dentin orange, the marginal ridges are lined
with Dentin material and finally, they are covered with Incisal
and Transparent material.
Please make sure to overcontour the restoration, so that the
actual tooth shape is achieved after the firing.
Condensing the ceramic surface (after contouring) using a
large, dry brush, makes it more homogeneous, which
prevents the ceramic from pulling away from the margin.
After lifting the bridge from the model supplement the
contact points with dentin and incisal materials. Before
firing, the individual units must be separated using a thin
blade and cutting through the ceramic down to the
opaquer. Moreover, a visual check must be made to make
sure that all areas are properly covered with ceramic prior to
firing.
For large restorations, such as multi-pontic bridges and
implant superstructures, the number of subsequent firings
can be reduced by conducting an intermediate firing using
either IPS Opaque Dentin or dentin material.
T
920°C
1688°F
B
403°C
757°F
S
4 min.
4 min.
t
60 °C
108°F
H
1 min.
1 min.
V
1
580°C
1076°F
V
2
919°C
1686°F
➚
37
Clean the restoration thoroughly before the
2
nd
dentin and incisal firing. Polishing beads must
not be used under any circumstances.
Firing parameters for the 2
nd
dentin and incisal firing
Firing parameters for the 1
st
dentin and incisal firing
Important:
If furnaces of other manufacturers are used, these
parameters have to be adjusted accordingly.
Important:
If furnaces of other manufacturers are used, these
parameters have to be adjusted accordingly.
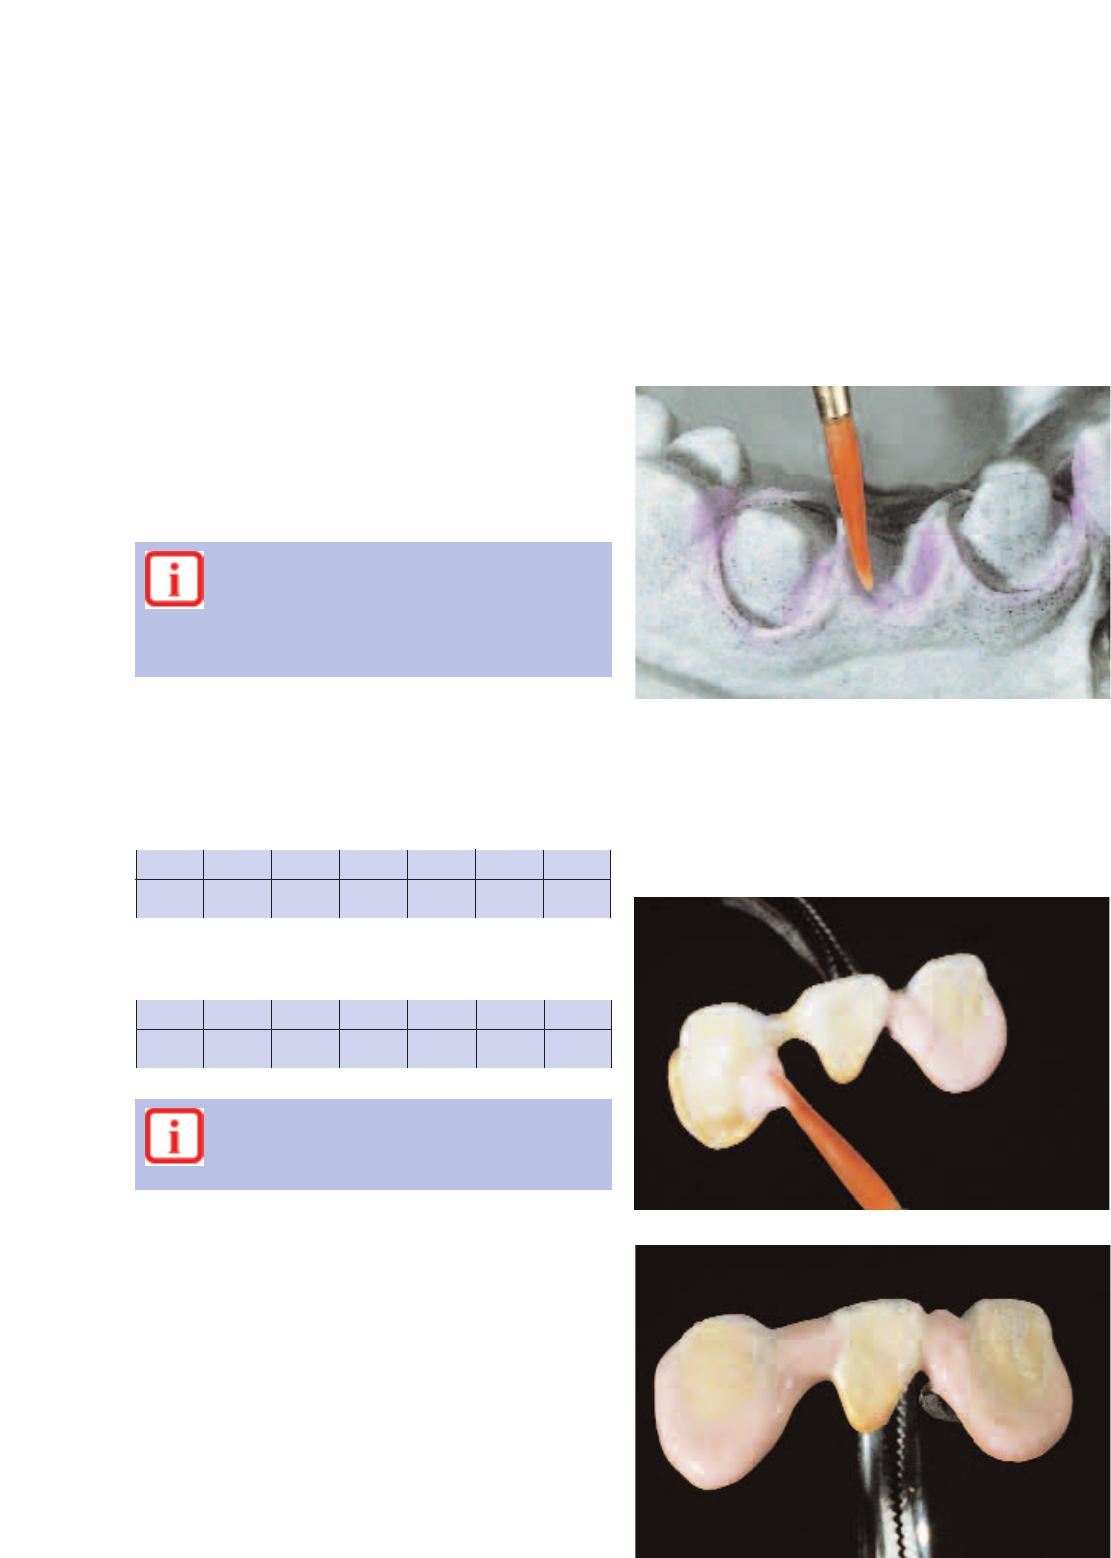
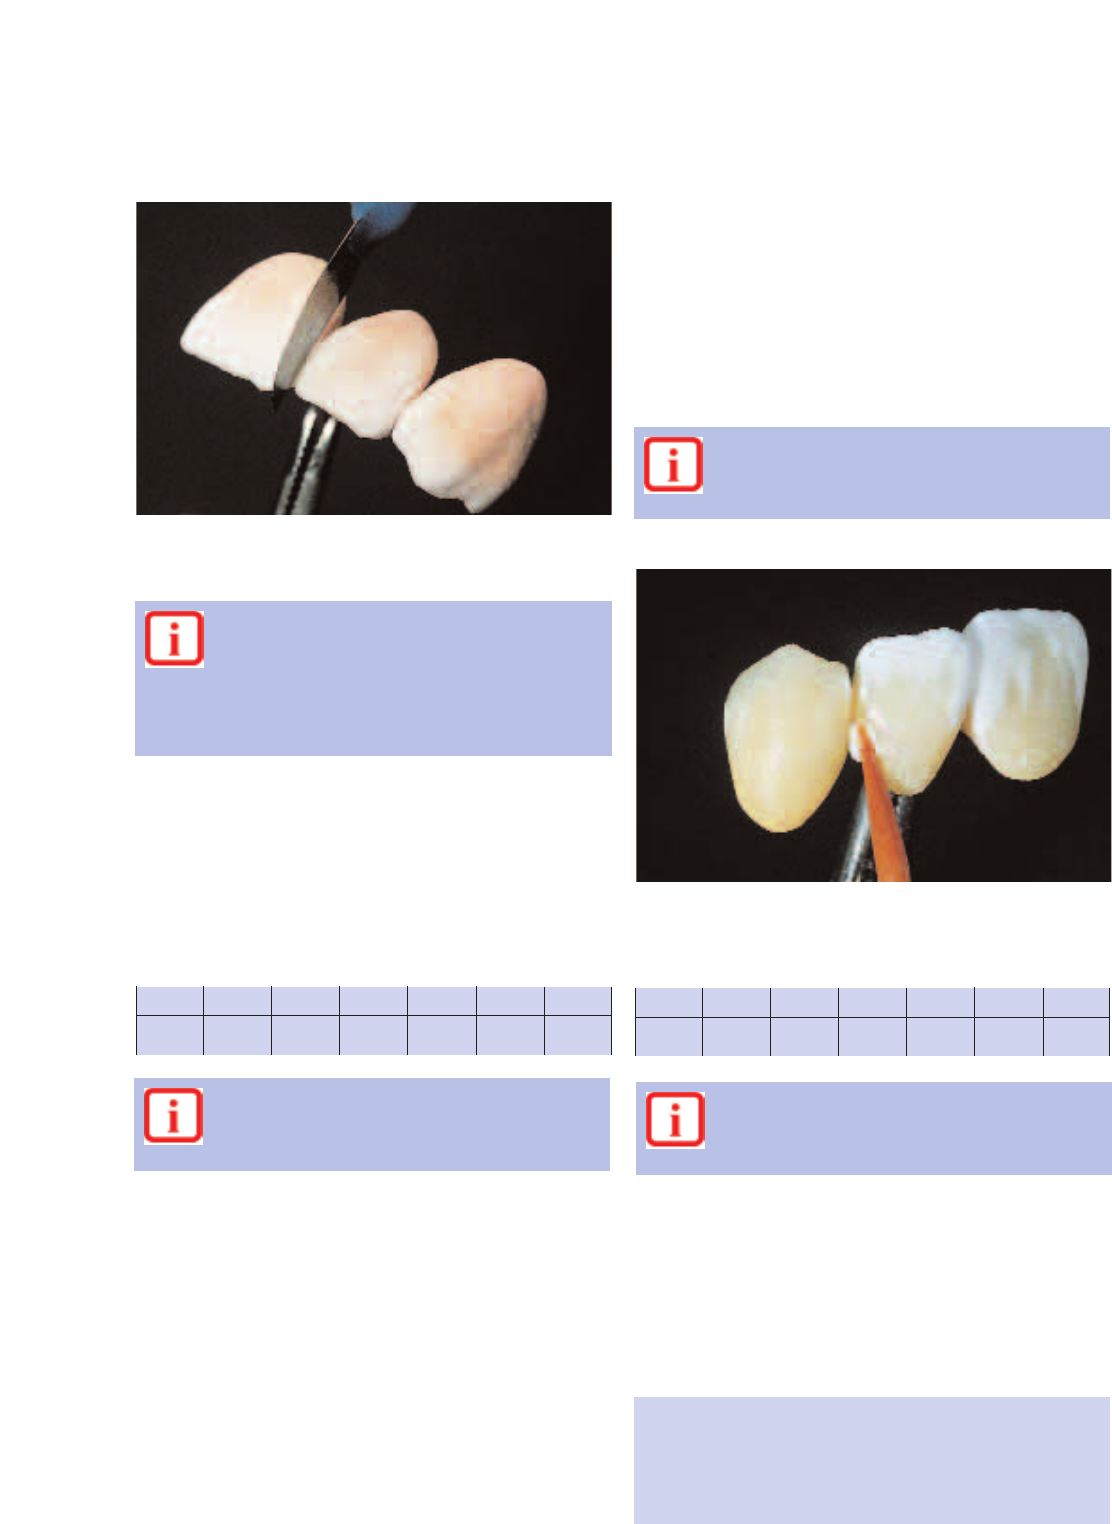
Once the contact points have been provided, the bridge restorations are separated in the interdental spaces
down to the opaquer using a sharp instrument (e.g. thin scalpel, razor blade).
The proximal areas are supplemented with the same materials used for the 1st dentin and incisal firing and
the restoration is adjusted using Incisal and Transparent materials.
2
nd
dentin and incisal firing
After the first dentin firing, the restoration is finished and
cleaned. After that, any deficient areas are supplemented
with the same materials used for the 1
st
dentin and incisal
firing. The interdental areas and proximal contact points must
be given special attention. Subsequently, conduct the
2
nd
dentin and incisal firing following the firing parameters
indicated below.
The completed restoration is now placed on the firing tray.
Please provide adequate support. The firing tray should be
positioned in the firing chamber only after the head is
completely open and the buzzer has sounded. Fire the
restorations with the following parameters:
–Provide adequate support for bridges on the
firing tray.
–Position the firing tray in the furnace only after the head
has completed its opening sequence (once the buzzer has
sounded).
Tip:
Before completion of the restoration, the roughly fired
restoration can be tried in to make sure that the shade,
shape and function of the layered restoration corresponds
with the patient's individual situation.
T
920°C
1688°F
B
403°C
757°F
S
4 min.
4 min.
t
60 °C
108°F
H
1 min.
1 min.
V
1
580°C
1076°F
V
2
919°C
1686°F
➚
T
910°C
1670°F
B
403°C
757°F
S
4 min.
4 min.
t
60 °C
108°F
H
1 min.
1 min.
V
1
580°C
1076°F
V
2
909°C
1668°F
➚
38
Providing a true-to-nature surface texture including growth lines and convex/concave areas.
Preparing the restoration for glaze firing
Prepare the restoration for glaze firing by providing surface
textures, such as growth lines and convex/concave areas.
Stains and characterization firing
To apply shade corrections and individual characterizations, a
wide shade range is available.
Shade corrections with IPS Shade, IPS Shade V and
IPS Stains-P
These stains can be fired in a separate stains firing. Small
shade adjustments and individualized characterizations can
be fired in a glaze firing.
IPS Shade and IPS Shade V
These dentin stains are used for subsequent
shade adjustments of IPS Classic
restorations. They are used for
surface staining and for internal
shading of the layering
materials.
Depending on the working habits of the user, the prominent
areas can be prepolished using silicone polishers.
Tip:
Natural surface textures may be made visible with the help
of gold and/or silver dust.
Subsequently, the restoration is cleaned with steam so that
the surface is free of dirt and grease. Make sure that the
entire gold/silver dust is removed.
Note:
Finishing ceramic restorations results in grinding dust.
Avoid inhalation. Use an appropriate suction equipment or
protective mask.
Note
– If too much IPS Shade Material is added, the
structure of the material can change (e. g.
distribution of grain size), which has a negative
effect on the ceramic construction.
–Clean the restoration thoroughly before the stains and
characterization firing. Polishing beads must not be used
under any circumstances.
Remove the desired amount of IPS Shade/ IPS Shade V from
the syringe and mix with IPS Classic Glazing and Staining
liquid to the desired consistency.
Apply IPS Shade/ IPS Shade V in the cervical area and the
body of the restoration. Check the shade adjustment
achieved with the help of the shade guide.
Avoid pooling or applying too thick of a layer. More
intensive shades are achieved by several staining procedures,
not by applying thicker layers. If the desired shade is not
achieved, repeat the stain firing using the same firing
parameters. If only minor shade adjustments are required,
they may be done during the glaze firing.
Firing parameters for the stain and characterization
firing – IPS Shade / IPS Shade V
Important
If furnaces of other manufacturers are used, these
parameters have to be adjusted accordingly.
T
900°C
1652°F
B
403°C
757°F
S
4 min.
4 min.
t
60 °C
108°F
H
1 min.
1 min.
V
1
0°C
0°F
V
2
0°C
0°F
➚

39
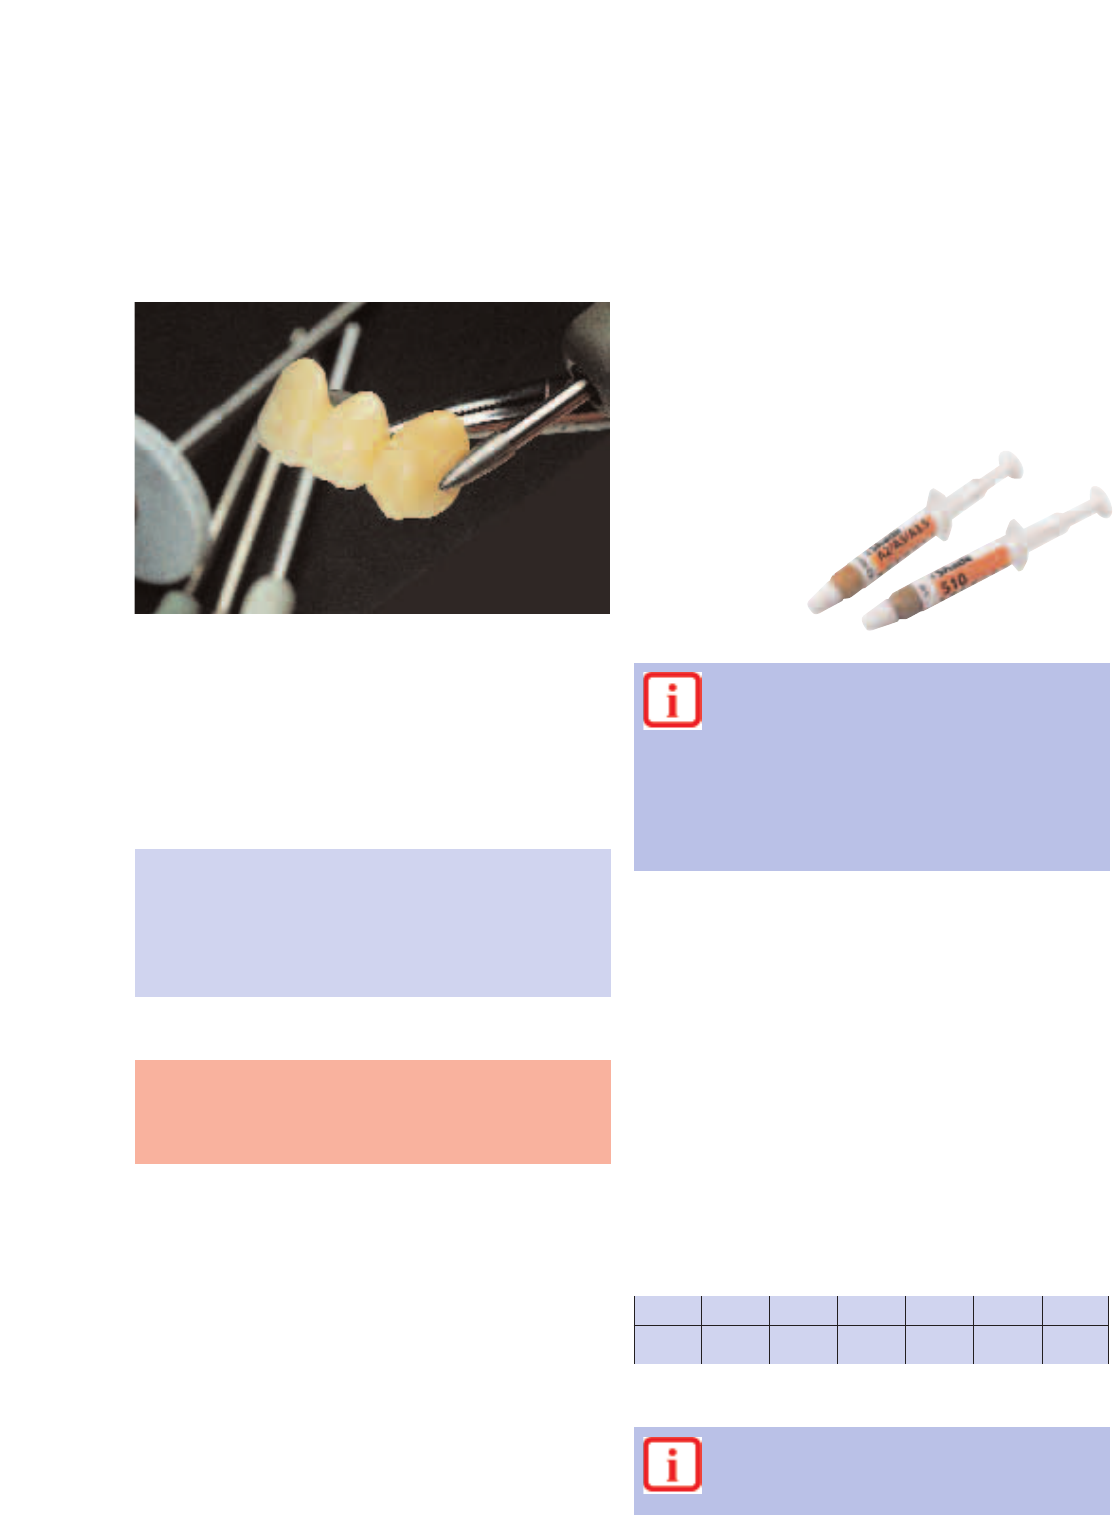
IPS Stains-P
Remove the desired amount of
IPS Stains from the syringe and mix
with IPS Classic Glazing and
Staining liquid to the desired
consistency.
Apply individualized
characterizations with
IPS Stains-P on the ceramic
surface, e. g. discoloration and enamel stains.
Note
If too much IPS Stains-P Material is added, the
structure of the material can change (e. g.
distribution of grain size), which has negative
effects on the ceramic construction.
Important
If furnaces of other manufacturers are used, these
parameters have to be adjusted accordingly.
Important
If furnaces of other manufacturers are used, these
parameters have to be adjusted accordingly.
Firing parameters for the stains firing – IPS Stains-P
Glaze firing
For the glaze firing, you have several options, depending on
the desired working procedure:
– Glaze firing without IPS Classic Glazing material for a true-
to-nature, silky-mat gloss.
– Glaze firing with IPS Classic Glazing material for a high
gloss.
The following basic rule applies:
The longer the holding time, the higher is the gloss.
Method 1
Glaze firing without glazing material
Slightly wet the restoration using IPS Classic Glazing and
Staining liquid and apply shade adjustments and/or
individualized characterizations. Position the restoration on
the honey-combed firing try and fire. If the glaze firing is
conducted without glazing materials, the stains should not
cover too large an area. After firing, the gloss of the
restoration may be adjusted to meet the patient's individual
requirements by polishing with rubber polishers, felt wheels,
and pumice.
Method 2
Glaze firing with glazing material
Remove IPS Classic Glazing material
from its container and mix
thoroughly. If another
consistency is desired,
the material can be slightly diluted with Classic Glazing and
Staining liquid. After that, apply glazing material in the usual
manner using a brush. Avoid pooling or applying too thick of
a layer.
Firing parameters for glaze firing without glazing
material
Apply minor shade adjustments on the applied
glazing material using IPS Shade, IPS Shade V and
IPS Stains-P.
T
900°C
1652°F
B
403°C
757°F
S
4 min.
4 min.
t
60 °C
108°F
H
1 min.
1 min.
V
1
0°C
0°F
V
2
0°C
0°F
➚
T
920°C
1688°F
B
403°C
757°F
S
4 min.
4 min.
t
60 °C
108°F
H
1 min.
1 min.
V
1
0°C
0°F
V
2
0°C
0°F
➚
40
Corrective firings
After the try-in of a restoration, minor shape adjustments,
e.g. contact points, pontic rests, margin shoulder
adjustments, may be necessary. To meet these different
requirements a low-fusing correction powder with medium
incisal opacity is available.
Depending on the individual preference, the IPS Classic
Correction Powder can be processed using two different
methods.
Method 1 (dentin / incisal adjustments)
Mix IPS Classic Correction Powder with any dentin or incisal
material in a 1:1 ratio and then mix with the desired build-up
liquid. Make adjustments and fire.
Firing parameters for the corrective firing with
IPS Classic Correction Powder (1:1)
Firing parameters for glaze firing with glazing material
Apply glazing material in the usual manner using a brush.
Finally, check the shade of the completed restoration with
the help of the corresponding shade tab.
Important
If furnaces of other manufacturers are used, these
parameters have to be adjusted accordingly.
T
900°C
1652°F
B
403°C
757°F
S
4 min.
4 min.
t
60 °C
108°F
H
1–2 min.
1–2 min.
V
1
0°C
0°F
V
2
0°C
0°F
➚
Important
If furnaces of other manufacturers are used, these
parameters have to be adjusted accordingly.
T
810°C
1490°F
B
403°C
757°F
S
4 min.
4 min.
t
60 °C
108°F
H
1 min.
1 min.
V
1
420°C
788°F
V
2
809°C
1488°F
➚
41
Method 2 (contact areas)
Mix IPS Classic Correction Powder alone with the desired
build-up liquid. Make adjustments and fire.
Firing parameters for the corrective firing with
IPS Classic Correction Powder (alone)
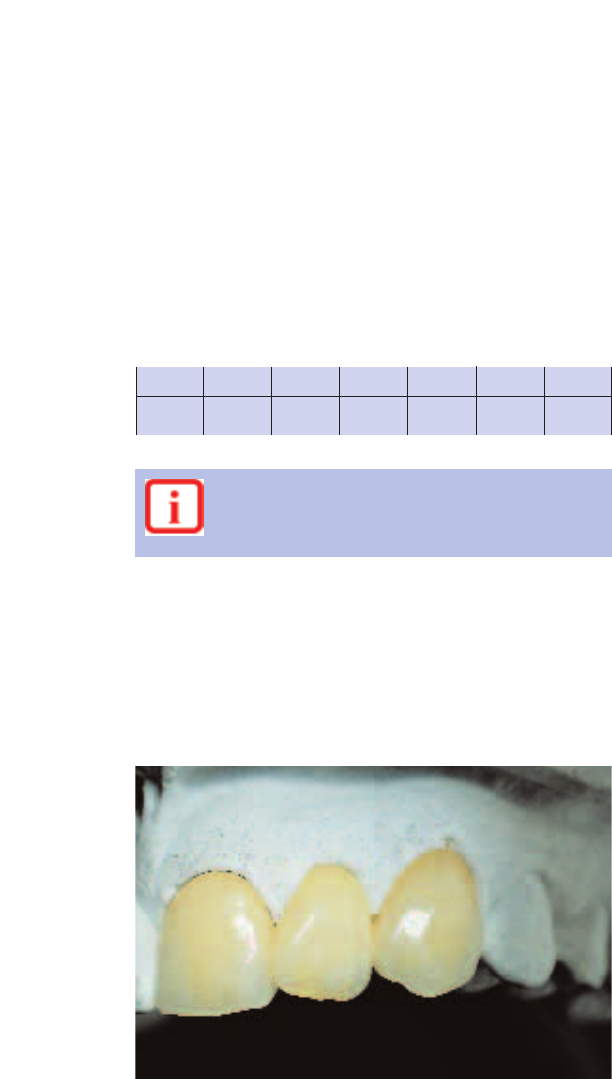
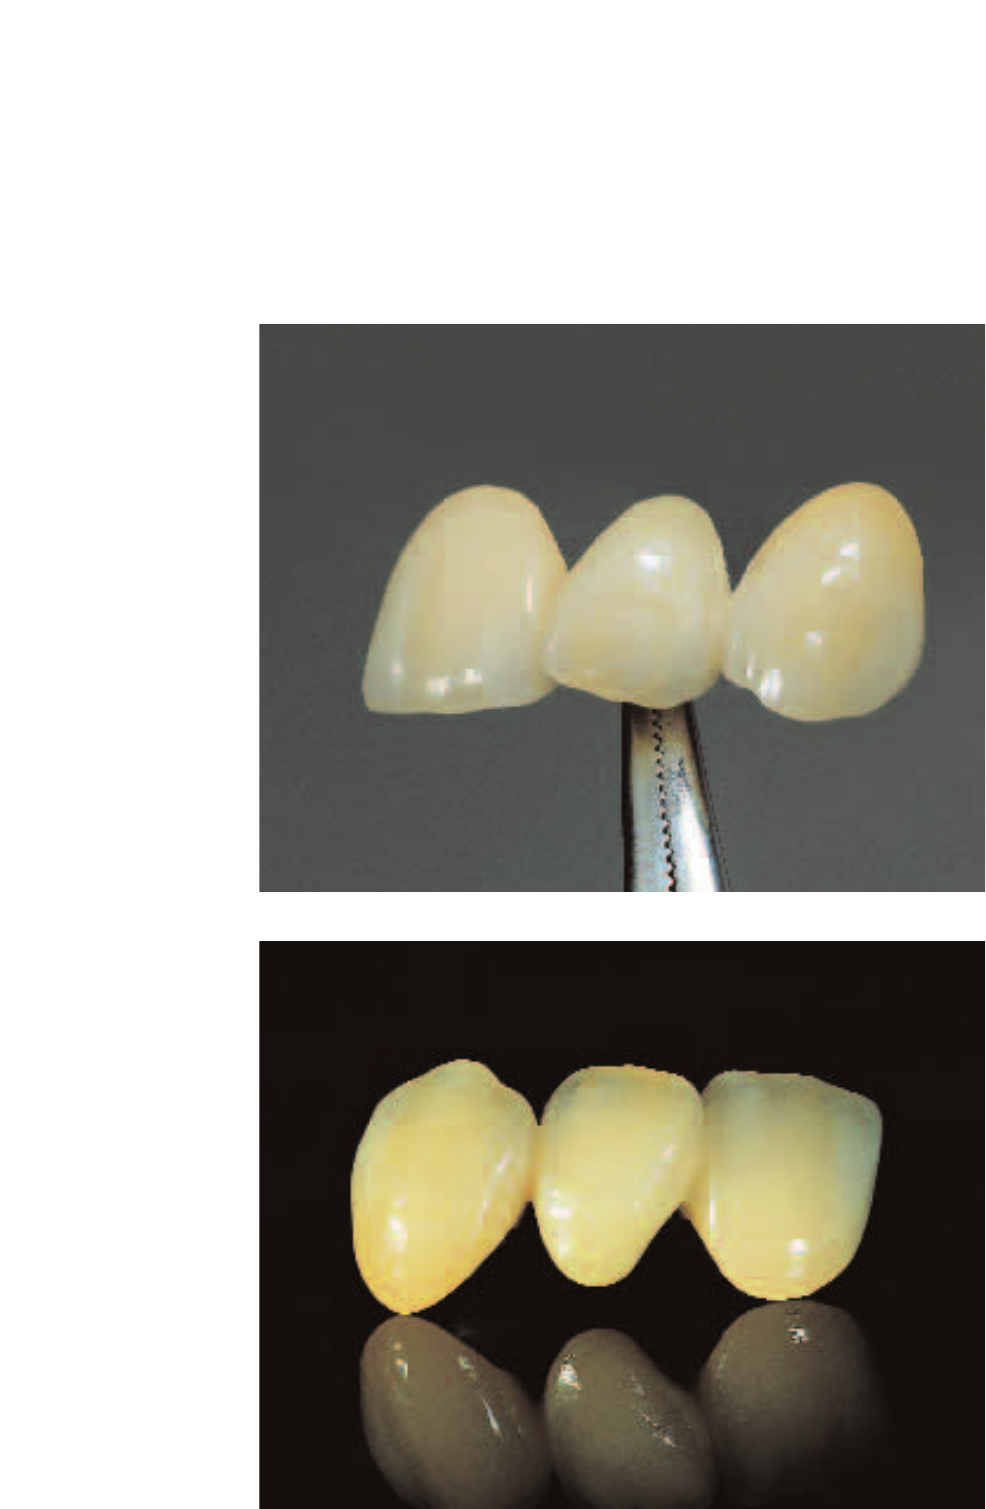
Completely fired IPS Classic bridge on the model.
The result:
Important
If furnaces of other manufacturers are used, these
parameters have to be adjusted accordingly.
T
690°C
1274°F
B
403°C
757°F
S
4 min.
4 min.
t
60 °C
108°F
H
0.5 min.
0.5 min.
V
1
420°C
788°F
V
2
689°C
1272.2°F
➚

42
Classic – Firing parameters
IPS
Firing parameters for the 1
st
opaquer firing (wash
firing) – IPS Classic Opaquer
Firing parameters for the 1
st
opaquer firing (wash
firing) –IPS Lowpaque
Firing parameters for the 2
nd
opaquer firing –
IPS Classic Opaquer
Firing parameters for the 2
nd
opaquer firing –
IPS Lowpaque
Firing parameters for the 1
st
margin shoulder firing –
IPS Classic Opaquer
Firing parameters for the 1
st
margin shoulder firing –
IPS Lowpaque
Firing parameters for the 2
nd
margin shoulder firing -
IPS Classic Opaquer
Firing parameters for the 2
nd
margin shoulder firing –
IPS Classic Lowpaque
Method A – IPS Classic Opaquer Method B – IPS Lowpaque
T
980°C
1796°F
B
403°C
757°F
S
6 min.
6 min.
t
80°C
144°F
H
1 min.
1 min.
V
1
550°C
1022°F
V
2
979°C
1794°F
➚
T
920°C
1688°F
B
403°C
757°F
S
6 min.
6 min.
t
80°C
144°F
H
1 min.
1 min.
V
1
450°C
842°F
V
2
919°C
1686°F
➚
T
970°C
1778°F
B
403°C
757°F
S
6 min.
6 min.
t
80°C
144°F
H
1 min.
1 min.
V
1
550°C
1022°F
V
2
969°C
1776°F
➚
T
910 °C
1670 °F
B
403°C
757°F
S
6 min.
6 min.
t
80°C
144°F
H
1 min.
1 min.
V
1
450°C
842°F
V
2
909°C
1668°F
➚
T
950°C
1742°F
B
403°C
757°F
S
6 min.
6 min.
t
80°C
144°F
H
1 min.
1 min.
V
1
550°C
1022°F
V
2
949°C
1740°F
➚
T
930°C
1706°F
B
403°C
757°F
S
6 min.
6 min.
t
80°C
144°F
H
1 min.
1 min.
V
1
550°C
1022°F
V
2
929°C
1704°F
➚
T
940°C
1724°F
B
403°C
757°F
S
4 min.
4 min.
t
80°C
144°F
H
1 min.
1 min.
V
1
550°C
1022°F
V
2
939°C
1722°F
➚
T
930°C
1706°F
B
403°C
757°F
S
4 min.
4 min.
t
80°C
144°F
H
1 min.
1 min.
V
1
550°C
1022°F
V
2
929°C
1704°F
➚
43
These firing parameters represent standard values
applicable to the P100, P 200, PX 1 and EP 600
Combi furnaces from Ivoclar Vivadent. The
temperatures indicated also apply to furnaces of older
generations, such as the P20, P80, P90 and P95. If one of
these furnaces is used, however, the temperatures may
deviate by ± 10 °C/18 °F, depending on the age and type of
the heating muffle.
If a non-Ivoclar Vivadent furnace is used, temperature
corrections may be necessary.
Regional differences in the power supply or the operation
of several electronic devices on the same circuit may make
adjustments of the firing temperatures necessary.
Ceramic furnaces of other manufacturers often feature
opening mechanisms different from that of Ivoclar Vivadent
furnaces. Therefore, the firing conditions may also differ.
Make sure that these varying firing conditions are taken
into account when working with IPS Classic.
Remember to calibrate your furnace regularly.
Firing parameters for IPS Opaque Dentin
(intermediate firing)
Firing parameters for the 1
st
dentin and incisal firing
Firing parameters for the stains and characterization
firing – IPS Shade / IPS Shade V
Firing parameters for the stains firing – IPS Stains-P
Firing parameters for glaze firing without glazing
material
Firing parameters for glaze firing with glazing material
Firing parameters for the corrective firing –
IPS Classic Correction Powder (1:1)
Firing parameters for the corrective firing –
IPS Classic Correction Powder (alone)
Firing parameters for the 2
nd
dentin and incisal firing
T
920°C
1688°F
B
403°C
757°F
S
4 min.
4 min.
t
60 °C
108°F
H
1 min.
1 min.
V
1
580°C
1076°F
V
2
919°C
1686°F
➚
T
920°C
1688°F
B
403°C
757°F
S
4 min.
4 min.
t
60 °C
108°F
H
1 min.
1 min.
V
1
580°C
1076°F
V
2
919°C
1686°F
➚
T
910°C
1670°F
B
403°C
757°F
S
4 min.
4 min.
t
60 °C
108°F
H
1 min.
1 min.
V
1
580°C
1076°F
V
2
909°C
1668°F
➚
T
900°C
1652°F
B
403°C
757°F
S
4 min.
4 min.
t
60 °C
108°F
H
1 min.
1 min.
V
1
0°C
0°F
V
2
0°C
0°F
➚
T
900°C
1652°F
B
403°C
757°F
S
4 min.
4 min.
t
60 °C
108°F
H
1 min.
1 min.
V
1
0°C
0°F
V
2
0°C
0°F
➚
T
920°C
1688°F
B
403°C
757°F
S
4 min.
4 min.
t
60 °C
108°F
H
1 min.
1 min.
V
1
0°C
0°F
V
2
0°C
0°F
➚
T
900°C
1652°F
B
403°C
757°F
S
4 min.
4 min.
t
60 °C
108°F
H
1–2 min.
1–2 min.
V
1
0°C
0°F
V
2
0°C
0°F
➚
T
810°C
1490°F
B
403°C
757°F
S
4 min.
4 min.
t
60 °C
108°F
H
1 min.
1 min.
V
1
420°C
788°F
V
2
809°C
1488°F
➚
T
690°C
1274°F
B
403°C
757°F
S
4 min.
4 min.
t
60 °C
108°F
H
0.5 min.
0.5 min.
V
1
420°C
788°F
V
2
689°C
1272.2°F
➚
44
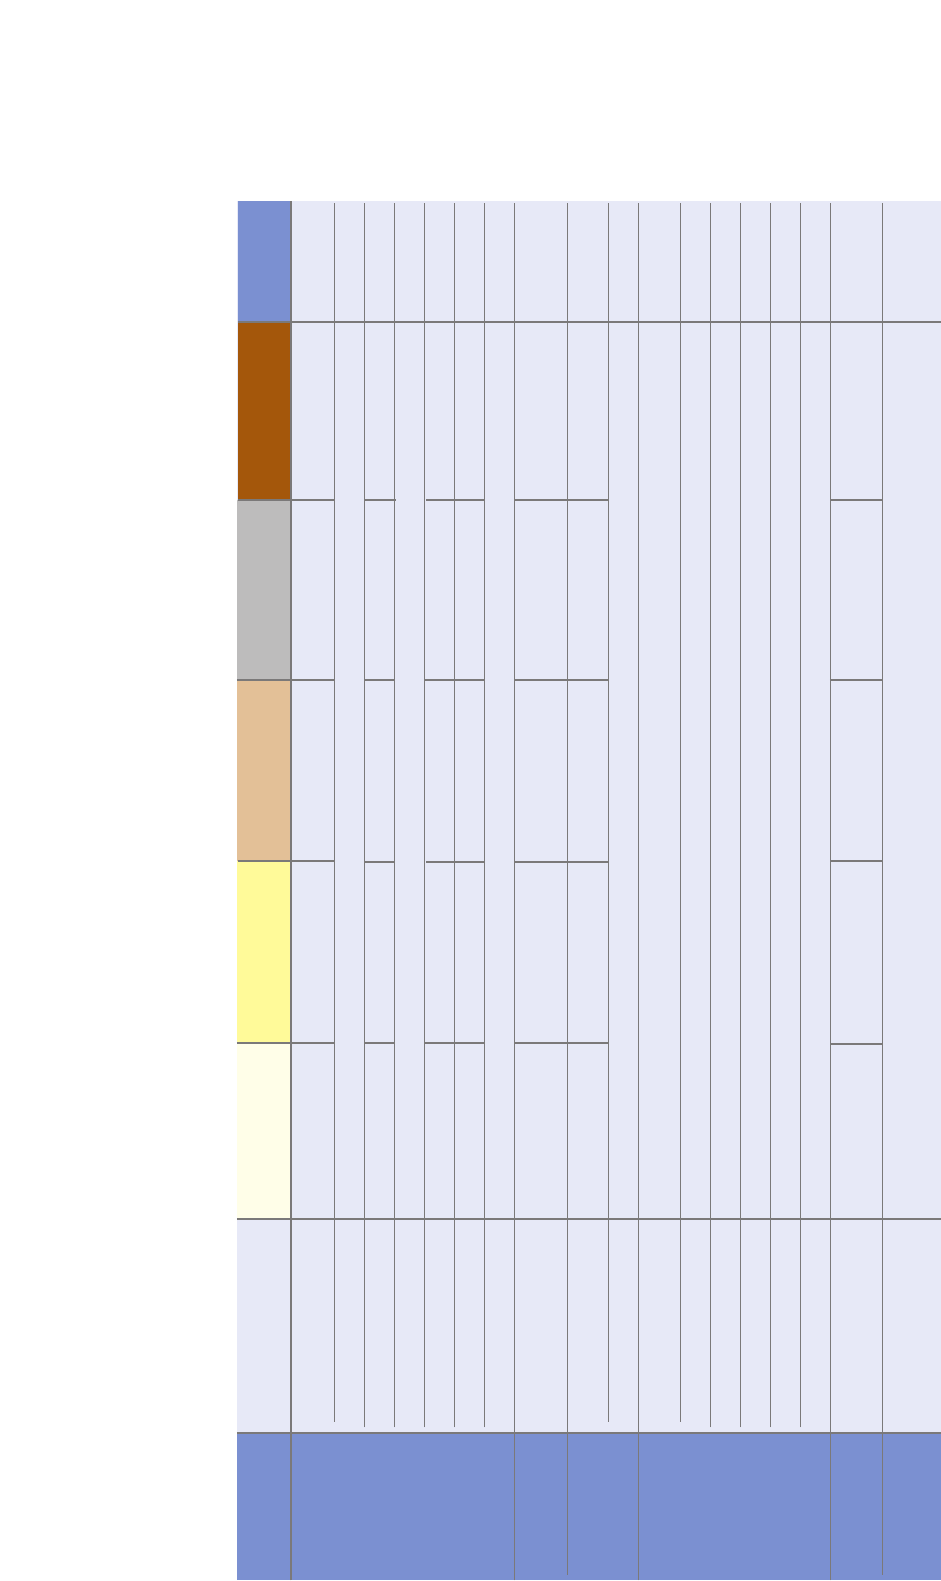
Classic –
Materials combination table
IPS
white
yellow
light brown
grey
dark brown
Chromascop shades
Assortment Materials / Shade groups Special materials
IPS Classic Opaquer (O) 110 120 130 140 210 220 230 240 310 320 330 340 410 420 430 440 510 520 530 540
Intensive Opaquer (IO) white, orange, brown, violet, grey
Dentin (D) 110 120 130 140 210 220 230 240 310 320 330 340 410 420 430 440 510 520 530 540
Intensive Dentin (ID) neutral, white, yellow honey, light brown, dark brown, pink, grey, blue, clear pink, red pink
Incisal (S) S3 S1 S1 S1 S1 S2 S2 S2 S5 S5 S5 S2 S4 S4 S1 S4 S4 S2 S5 S3
Opal Incisal (OS) OS3 OS1 OS1 OS1 OS1 OS2 OS2 OS2 OS5 OS5 OS5 OS2 OS4 OS4 OS1 OS4 OS4 OS2 OS5 OS3
Transparent (T) neutral, reddish, greyish, transparent
IPS Opaque Dentin Opaque Dentin (Op.D.) – 120 130 140 210 220 230 240 310 320 – – 410 420 430 440 510 – – –
IPS Margin Margin (M) M1 M2 M2 M3 M3 M3 M4 M4 M6 M6 M5 M5 M9 M9 M9 M9 M9 M7 M7 M8
Intensive Margin (M) M10, M11, M12, M13, M14
IPS Impulse Occlusal Dentin (Oc.D.) brown, yellow, orange
Mamelon material (MM) MM1, MM2, MM3, MM4,MM orange
Incisal (S) yellow-grey, grey
Transparent (T) yellow-grey, grey, blue
Molar Incisal (MS) MS
Incisal Edge material (IS) light yellow, yellow
IPS Shade Dentin Stains 110 120 130 140 210 220 230 240 310 320 330 340 410 420 430 440 510 520 530 540
IPS Stains-P Characterization Stains white, orange, bamboo, caramel brown, copper brown, cork brown, mahogany, azure, black yellow, red, blue
45
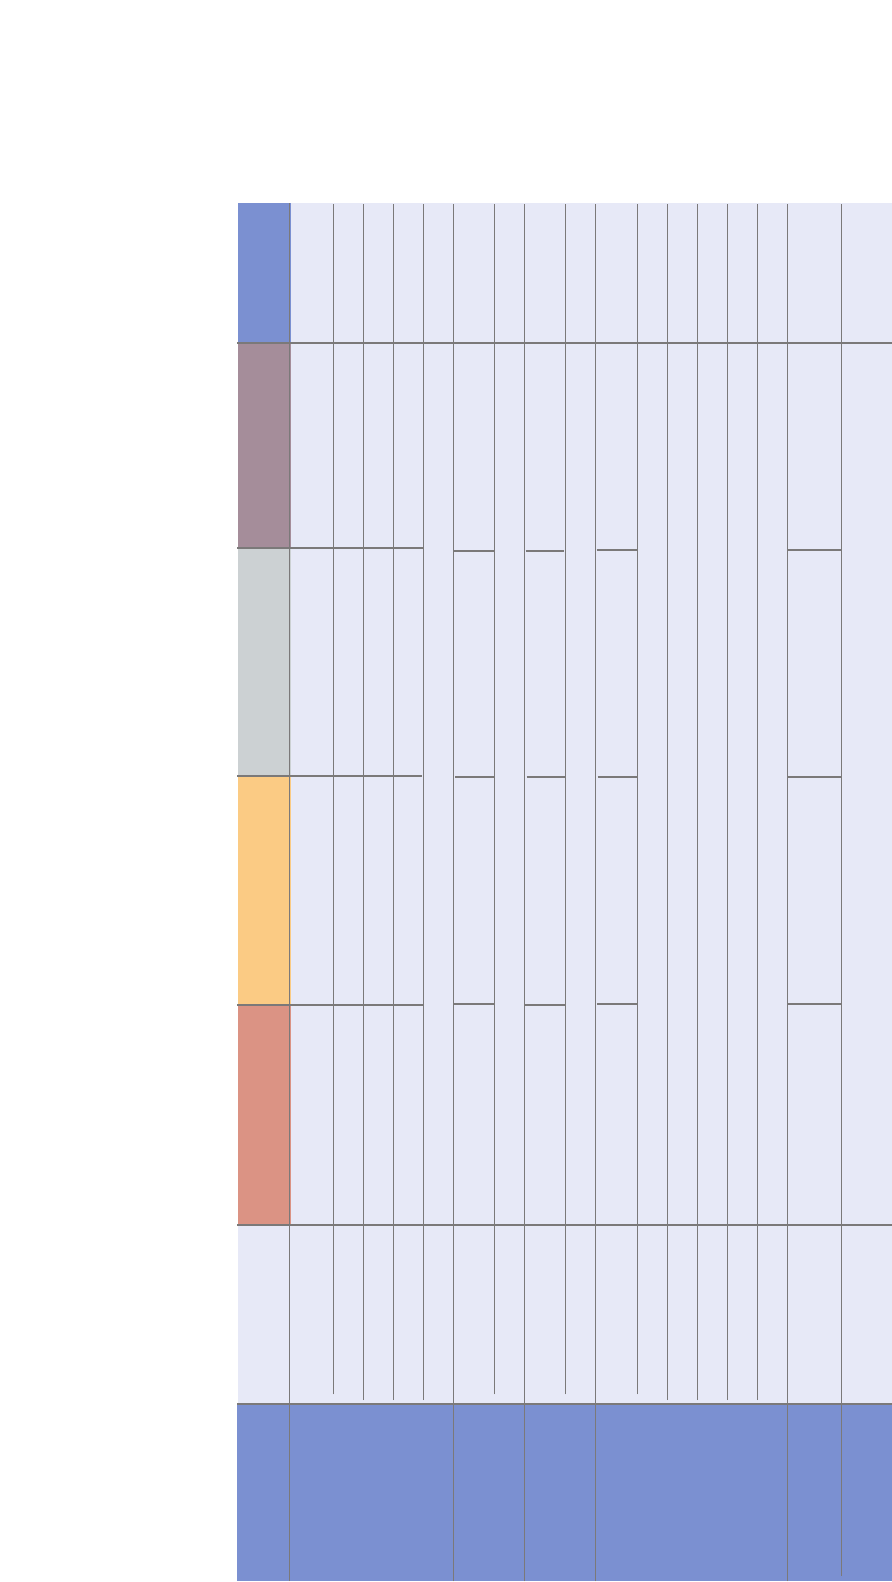
A–D shades
Assortment Materials / Shade groups ABCDSpecial materials
IPS Classic V Opaquer (O) A1 A2 A3 A3.5 A4 B1 B2 B3 B4 C1 C2 C3 C4 D2 D3 D4
Intensive Opaquer (IO) IO-A IO-B IO-C IO-A/IO-B IO-white, IO-violet
Dentin (D) A1 A2 A3 A3.5 A4 B1 B2 B3 B4 C1 C2 C3 C4 D2 D3 D4
Incisal (S) S1 S2 S2 S4 S4 S1 S2 S3 S4 S2 S2 S3 S4 S1 S2 S3
Transparent (T) clear, neutral
IPS Opaque Dentin V Opaque Dentin (Op.D.) A1 A2 A3 A3.5 A4 B1 B2 B3 B4 C1 C2 C3 C4 D2 D3 D4
Opaque Dentin (Op.D.) yellow, orange, brown
IPS Margin V Margin Material (M) A1 A2 A3 A3.5 A4 B1 B2 B3 B4 C1 C2 C3 C4 D2 D3 D4
Intensive (M) yellow, orange, brown
IPS Impulse Occlusal Dentin (Oc.D.) orange yellow brown orange, yellow
Mamelon Material (MM) MM1, MM2, MM3, MM4, MM orange
Incisal (S) yellow-grey, grey
Transparent (T) yellow-grey, grey, blue
Molar Incisal (MS) MS
Incisal Edge material (IS) light yellow, yellow
IPS Shade V Dentin Stains A1 A2 A3 A3.5 A4 B1 B2 B3 B4 C1 C2 C3 C4 D2 D3 D4
IPS Stains-P Characterization Stains white, orange, bamboo, caramel brown, copper brown, cork brown, mahogany, azure, black basic yellow, basic
red, basic blue
46
Classic – A sound concept always
reaps success!
IPS

47

Ivoclar Vivadent AG
Bendererstrasse 2
FL-9494 Schaan
Liechtenstein
Tel. +423 235 35 35
Fax +423 235 33 60
www.ivoclarvivadent.com
Ivoclar Vivadent Pty. Ltd.
1 – 5 Overseas Drive
P. O. Box 367
Noble Park, Vic. 3174
Australia
Tel. +61 3 979 595 99
Fax +61 3 979 596 45
Ivoclar Vivadent Ltda.
Rua Maestro João Gomes de
Araújo 50; Salas 92/94
Sao Paulo, CEP 02332-020
Brasil
Tel. +55 11 69 59 89 77
Fax +55 11 69 71 17 50
Ivoclar Vivadent, Inc.
23 Hannover Drive
St. Catharines, Ont. L2W 1A3
Canada
Tel. +1 800 263 8182
Fax +1 905 988 5411
Ivoclar Vivadent Marketing
Ltd.
Calle 134 No. 13-83, Of. 520
Bogotá
Colombia
Tel. +57 1 627 33 99
Fax +57 1 633 16 63
Ivoclar Vivadent SAS
B.P. 118
F-74410 Saint-Jorioz
France
Tel. +33 450 88 64 00
Fax +33 450 68 91 52
Ivoclar Vivadent GmbH
Dr. Adolf-Schneider-Str. 2
D-73479 Ellwangen, Jagst
Germany
Tel. +49 (0) 79 61 / 8 89-0
Fax +49 (0) 79 61 / 63 26
Ivoclar Vivadent UK Limited
Meridian South
Leicester
LE19 1WY
Great Britain
Tel. +44 116 265 40 55
Fax +44 116 265 40 57
Ivoclar Vivadent s.r.l.
Via dell’Industria 16
I-39025 Naturno (BZ)
Italy
Tel. +39 0473 67 01 11
Fax +39 0473 66 77 80
Ivoclar Vivadent S.A. de C.V.
Av. Mazatlán No. 61, Piso 2
Col. Condesa
06170 México, D.F.
Mexico
Tel. +52 (55) 55 53 00 38
Fax +52 (55) 55 53 14 26
Ivoclar Vivadent Ltd
12 Omega St, Albany
PO Box 5243 Wellesley St
Auckland, New Zealand
Tel. +64 9 914 9999
Fax +64 9 914 9990
Ivoclar Vivadent Polska Sp.
z.o.o.
ul. Jana Pawla II 78
PL-01-501 Warszawa
Poland
Tel. +48 22 635 54 96
Fax +48 22 635 54 69
Ivoclar Vivadent S.A.
c/Emilio Muñoz, 15
Esquina c/Albarracín
E-28037 Madrid
Spain
Tel. +34 91 513 10 08
Fax +34 91 552 64 07
Ivoclar Vivadent AB
Dalvägen 16
S-169 56 Solna
Sweden
Tel. +46 8 514 93 930
Fax +46 8 514 93 940
Ivoclar Vivadent, Inc.
175 Pineview Drive
Amherst, N.Y. 14228
USA
Tel. +1 800 533 6825
Fax +1 716 691 2285
Ivoclar Vivadent – worldwide
Date information prepared:
05/2003
These materials have been developed solely for use
in dentistry. Processing should be carried out
according to the Instructions for Use. Liability cannot
be accepted for damages resulting from failure to
observe the Instructions or the stipulated area of
application. The user is responsible for testing the
material for its suitability for any purpose not
explicitly stated in the Instructions. This also applies
if the materials are mixed or processed with
products of other manufacturers.
Descriptions and data constitute no warranty of
attributes and are not binding.
Printed in Liechtenstein
© Ivoclar Vivadent AG, Schaan / Liechtenstein
574376/0603/e/2/BVD
